• Home
  • Categories
  • Contact
  • Subscribe
  • About
Menu

Julie's Taste

Street Address
City, State, Zip
Phone Number

Your Custom Text Here

Julie's Taste

  • Home
  • Categories
  • Contact
  • Subscribe
  • About

SLOW COOKED PORK TACOS

May 25, 2024 Julie Sanchez

Every couple of months I slow cook a pork butt and use it to make several meals. We use the pork to make tacos one night and baked potatoes stuffed with pork for another night.

When you walk into your house, after the pork butt has cooked for hours, the smell will instantly make you hungry. You open up the crock pot and steal a piece of fall off the bone meat and you will understand how delicious a pork butt can be.


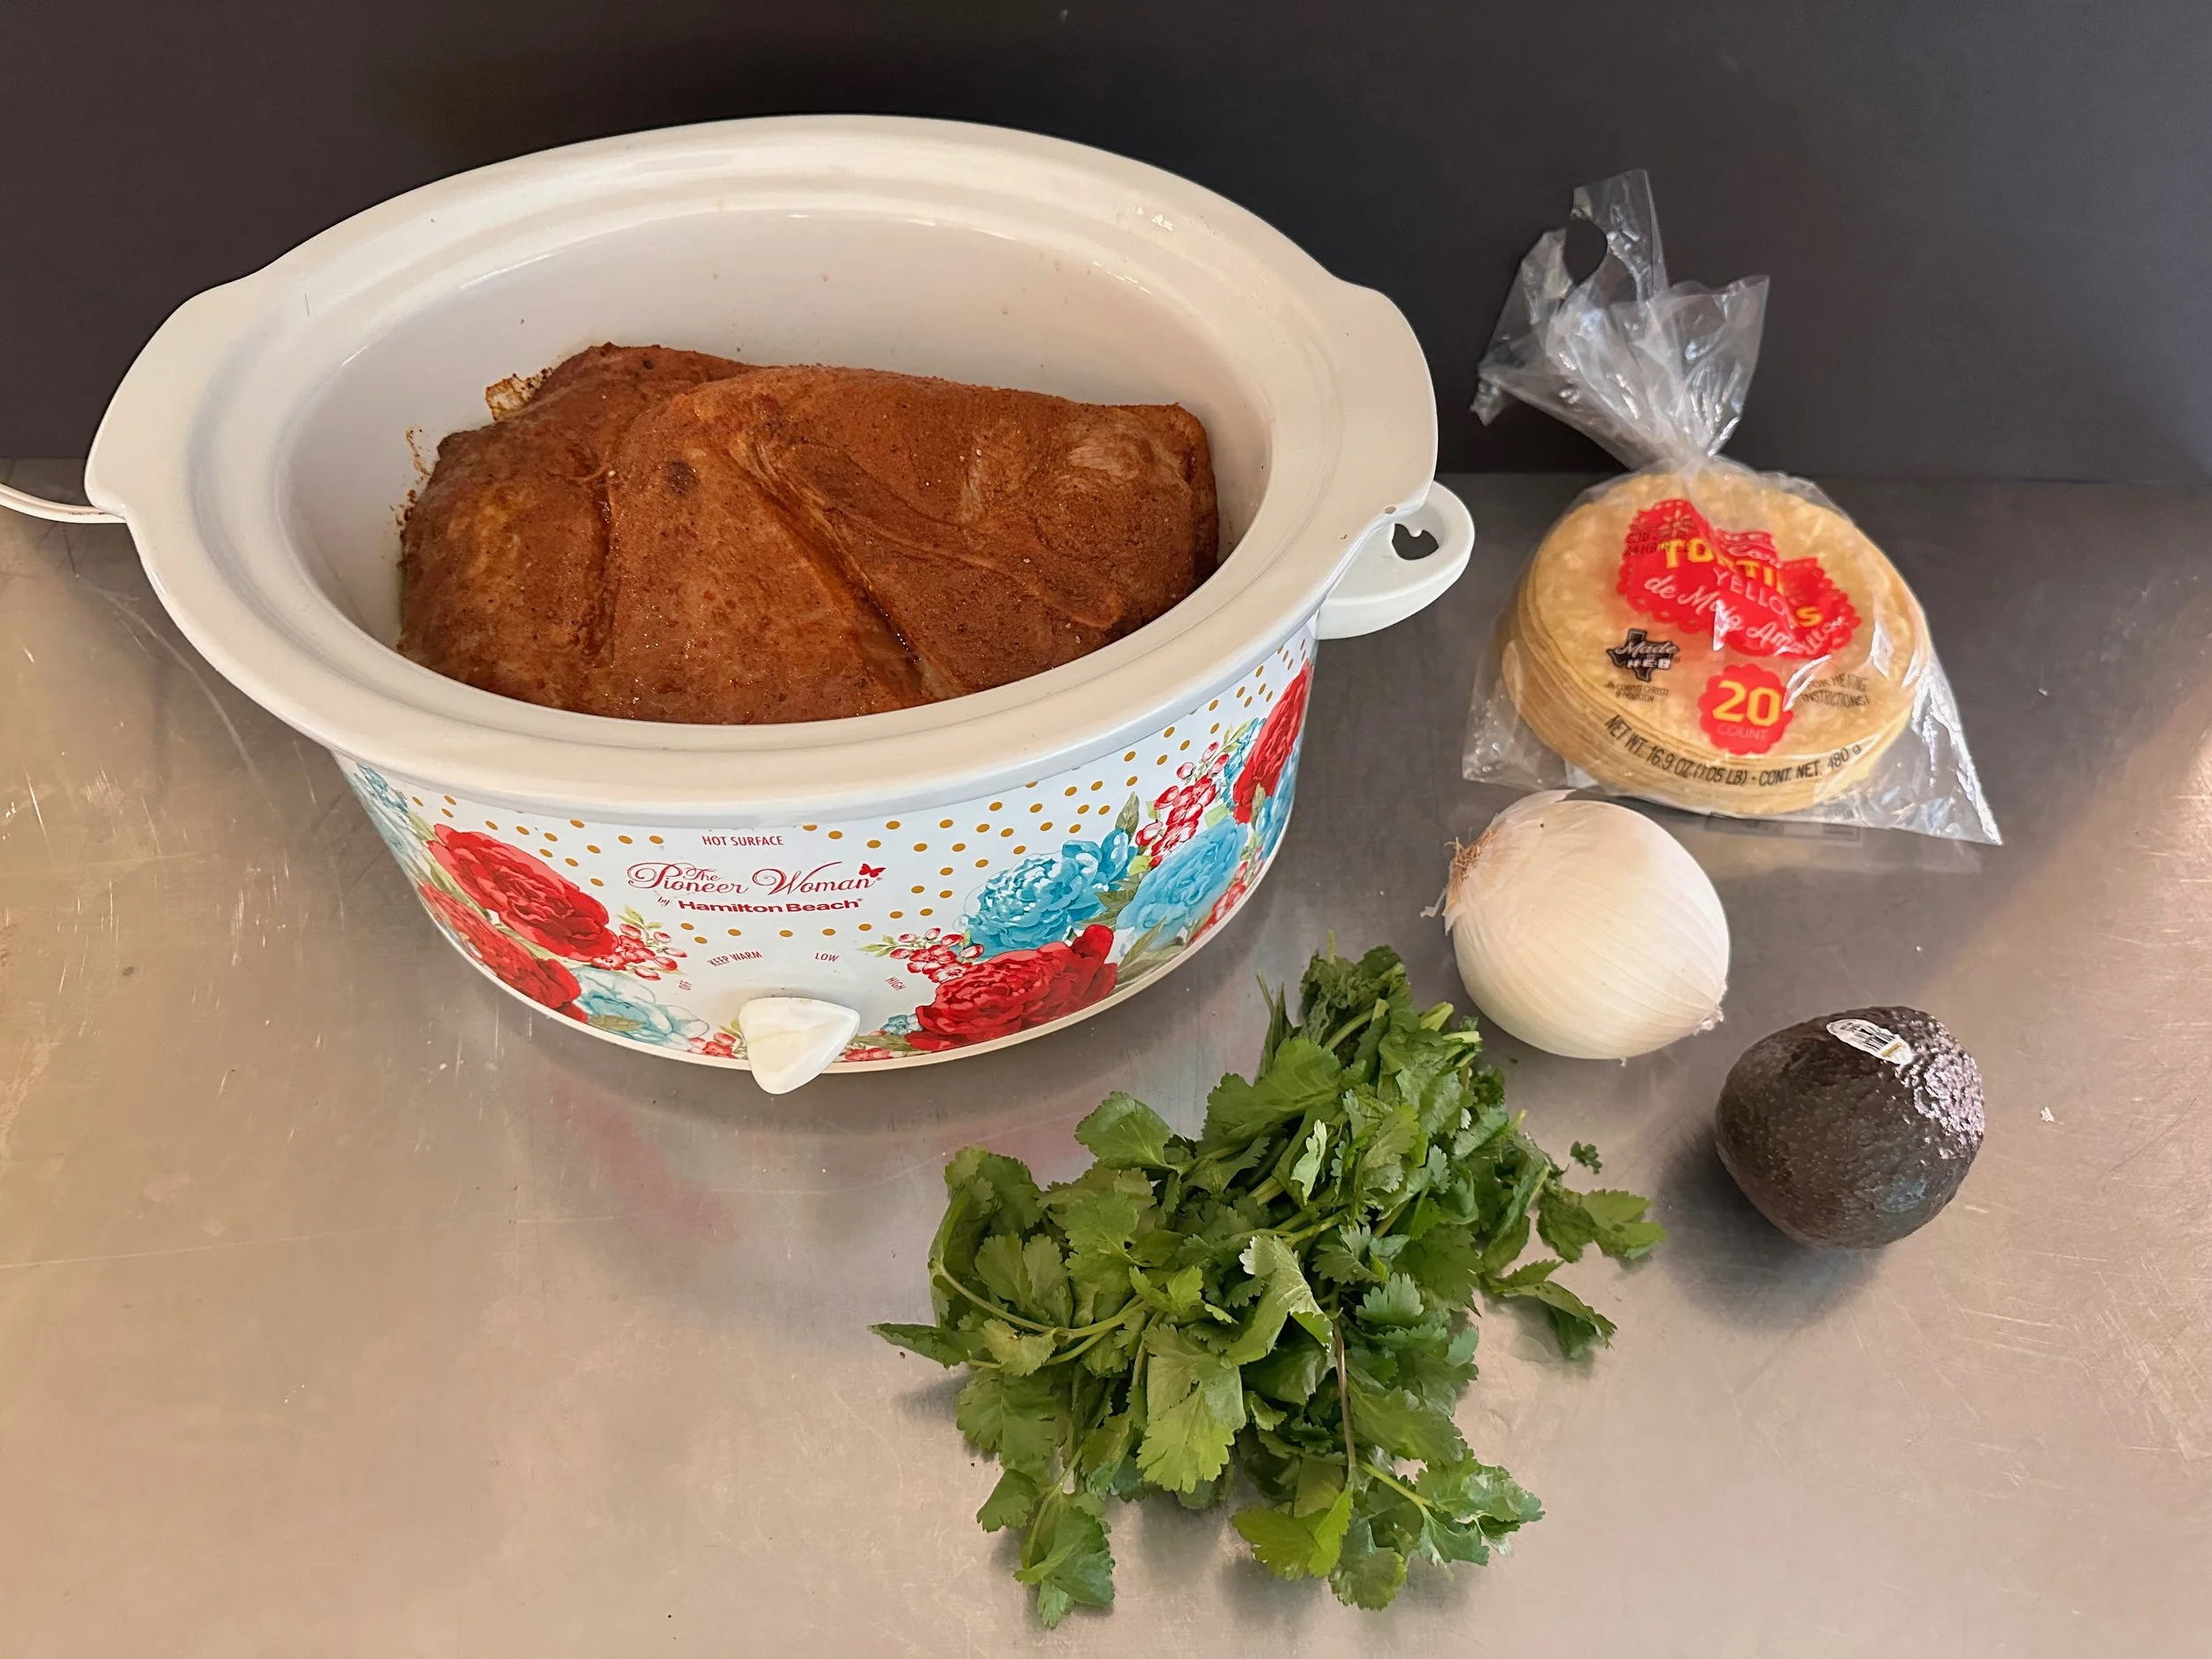
You need your slow cooked pork butt, corn tortillas, avocado, and a mixture of finely diced onions and cilantro to sprinkle on top of your taco. Go here for my Slow Cooked Pork Butt recipe.


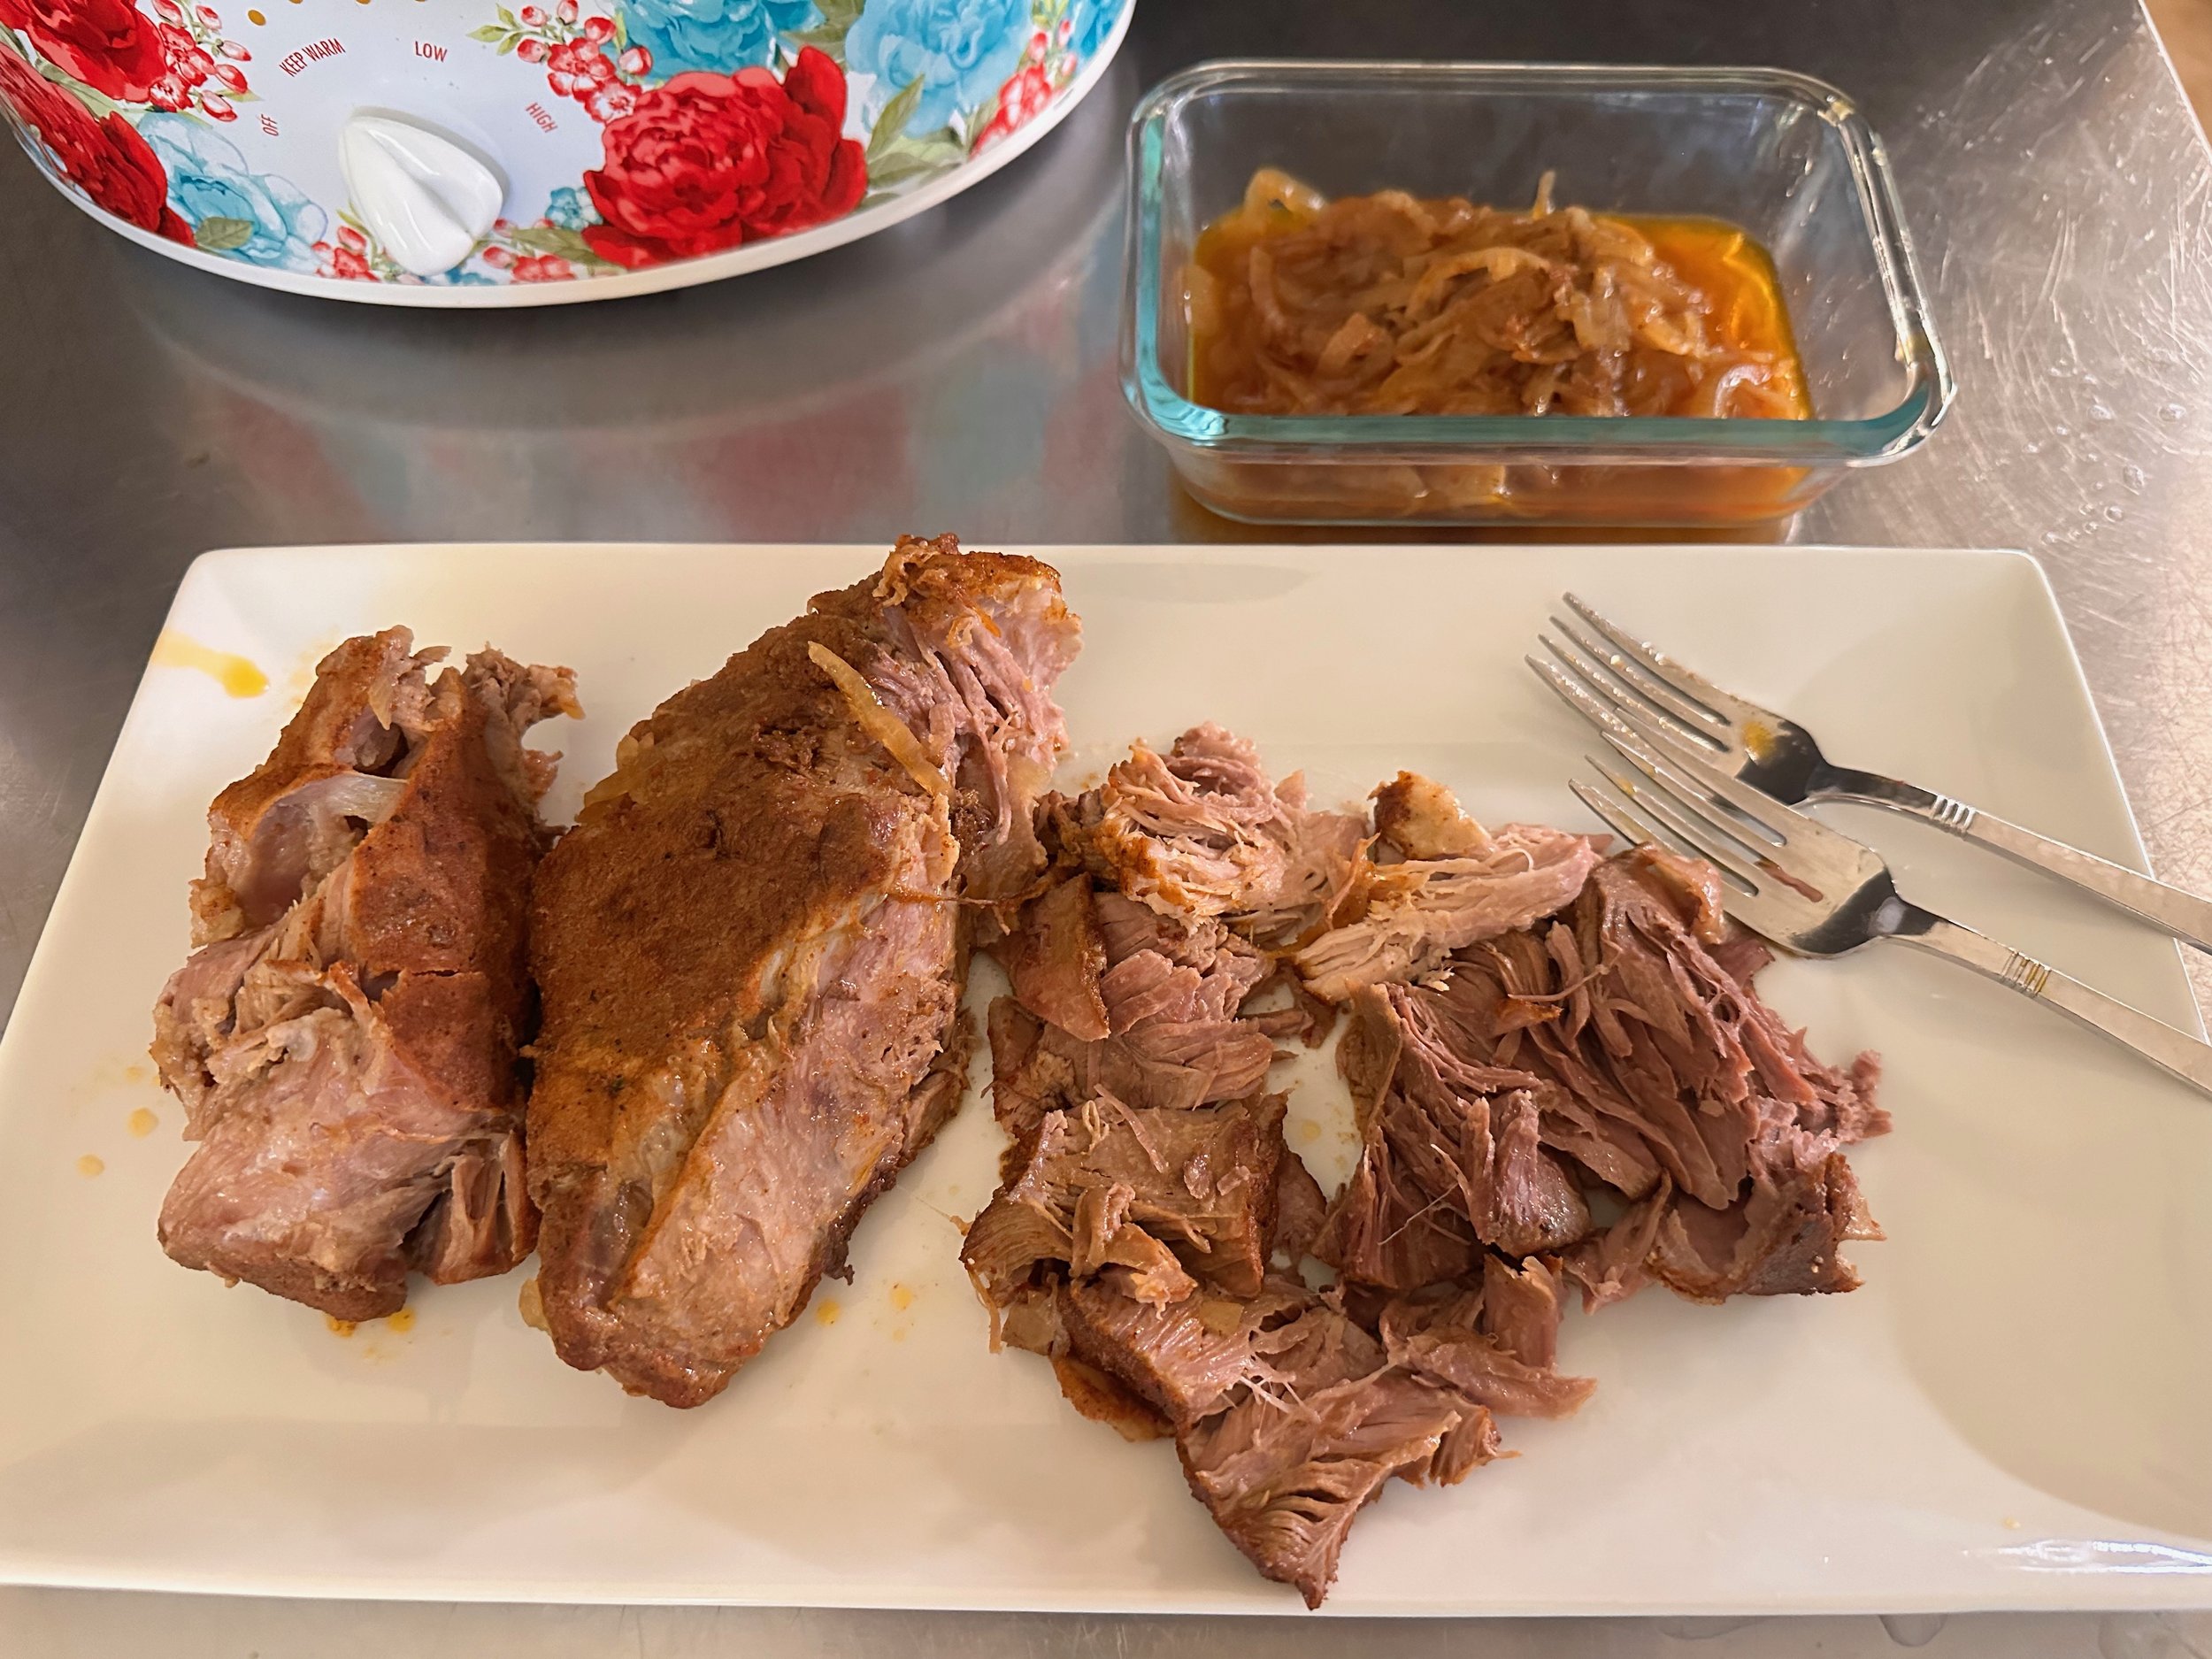
Chop the cooked pork into small pieces.


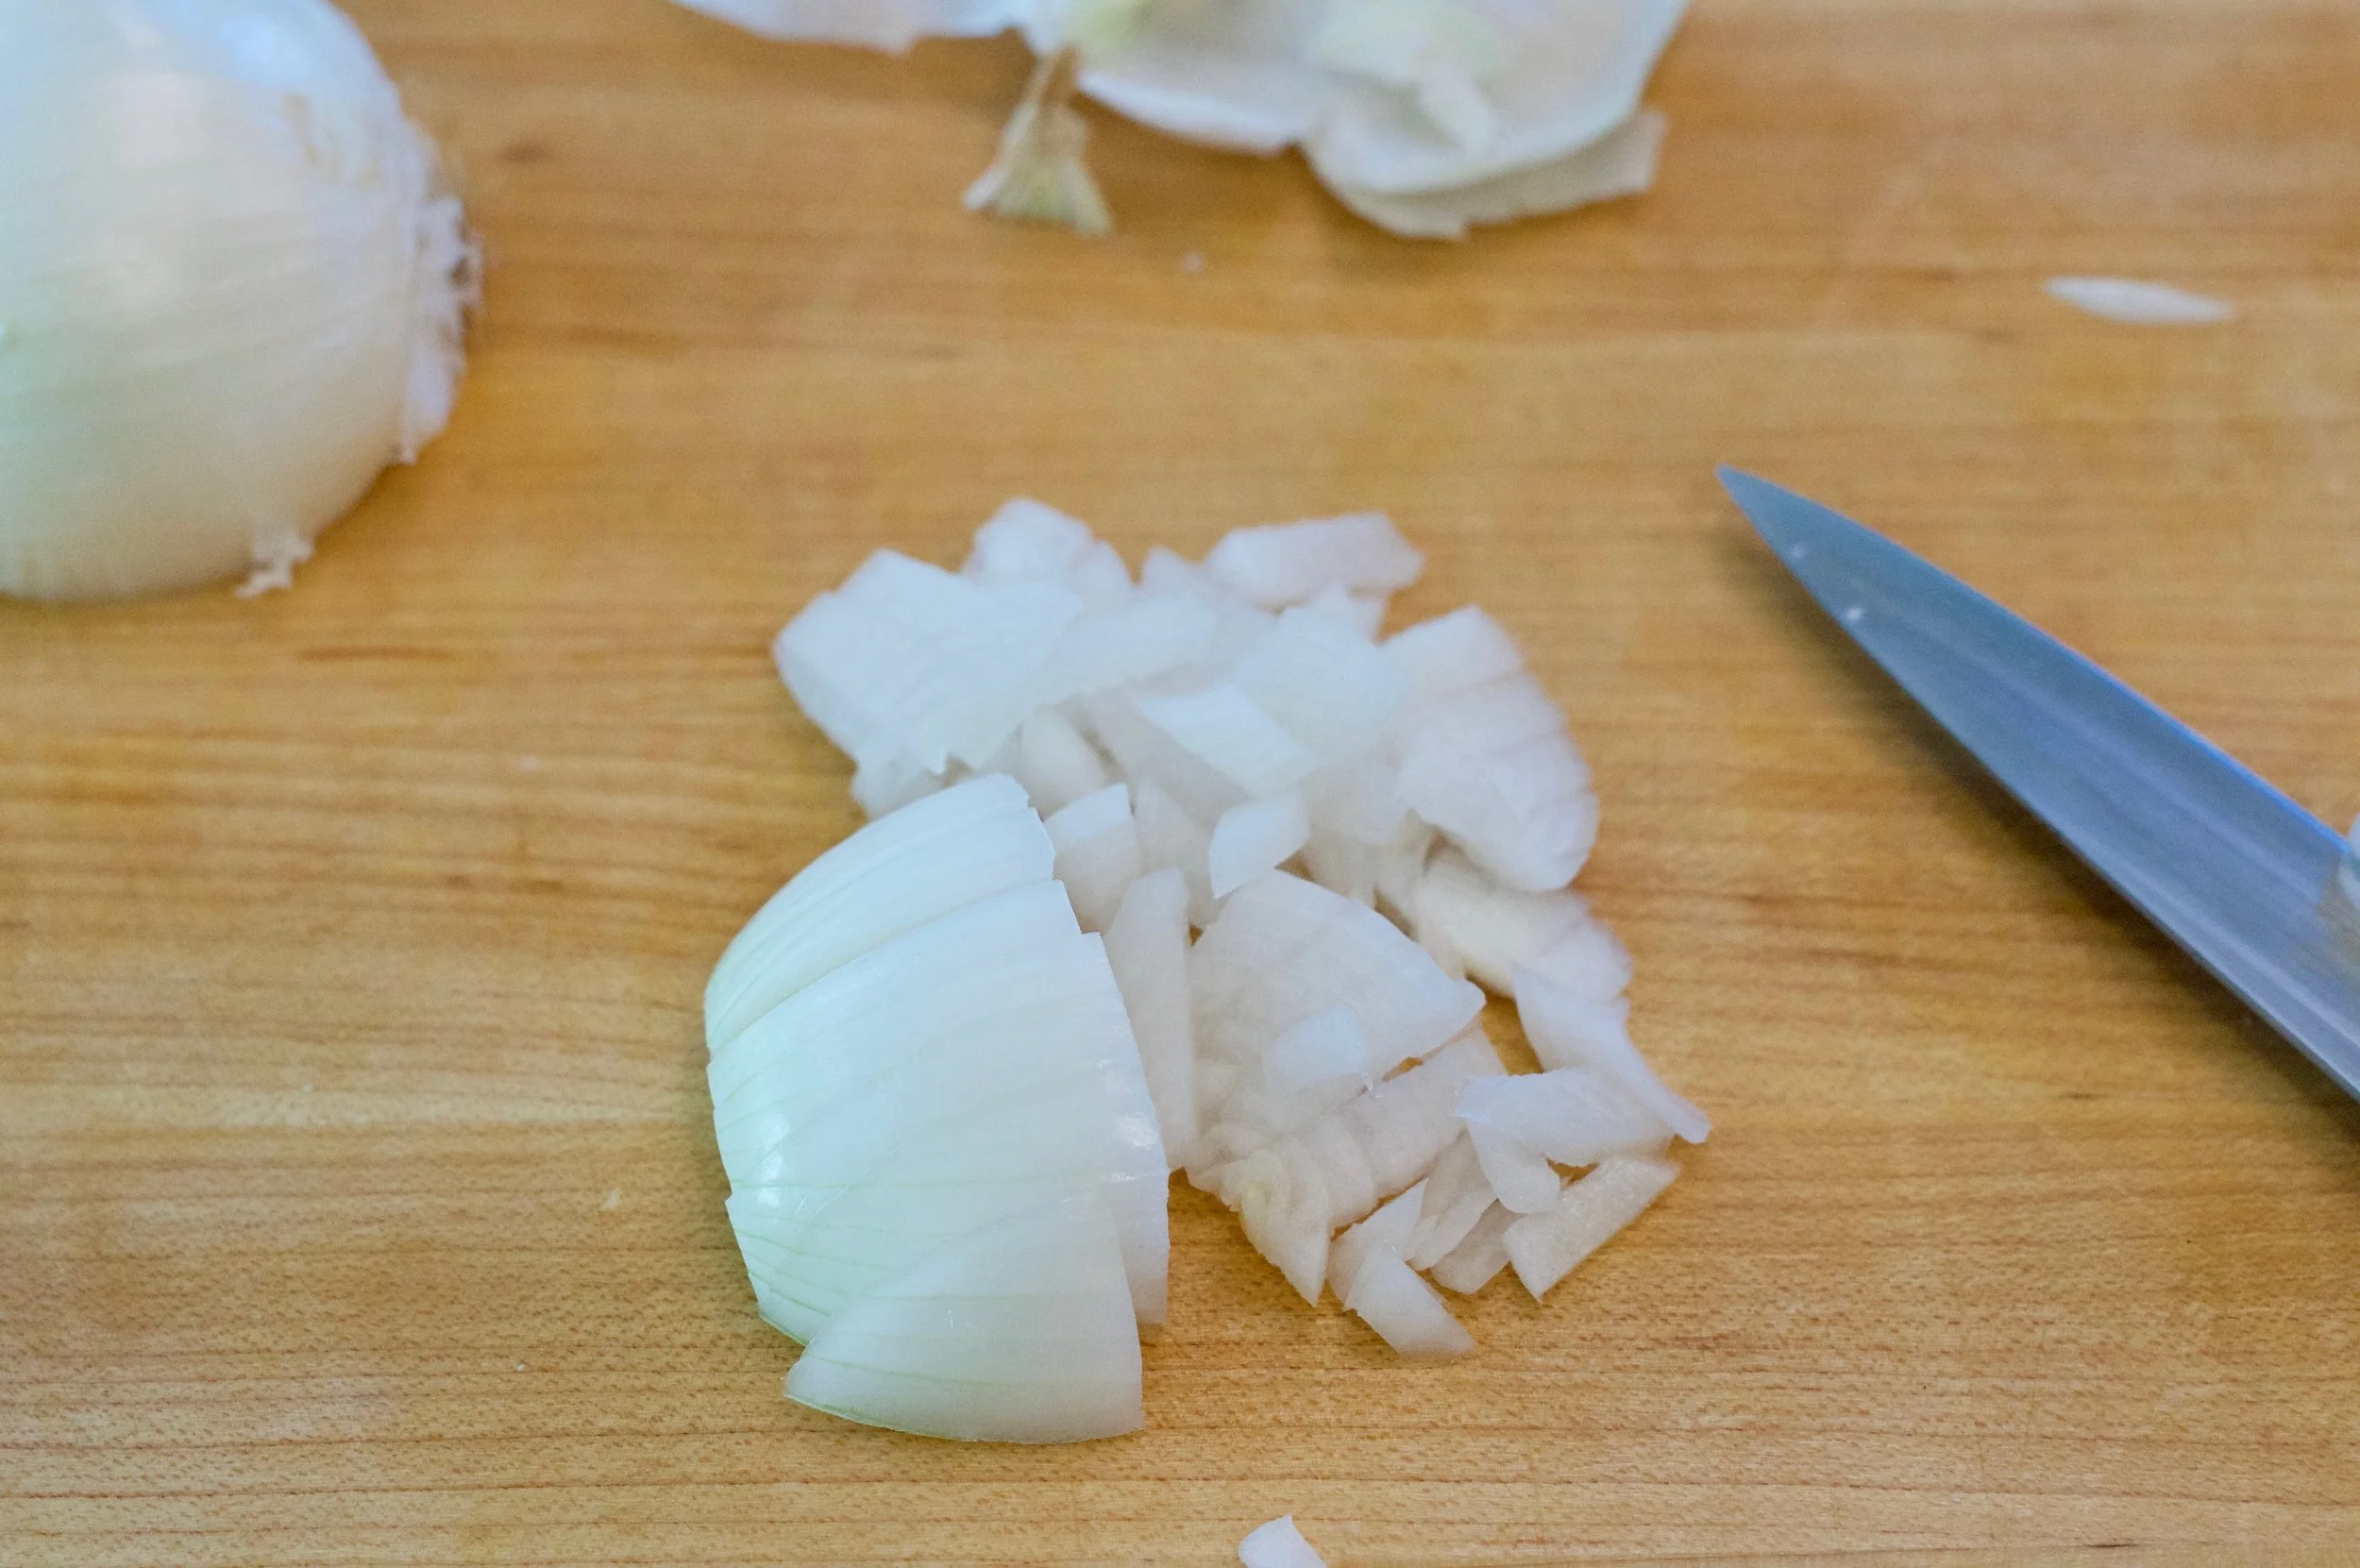
Chop up the onions as finely as possible.. you do not want chunks of onion in your tacos.


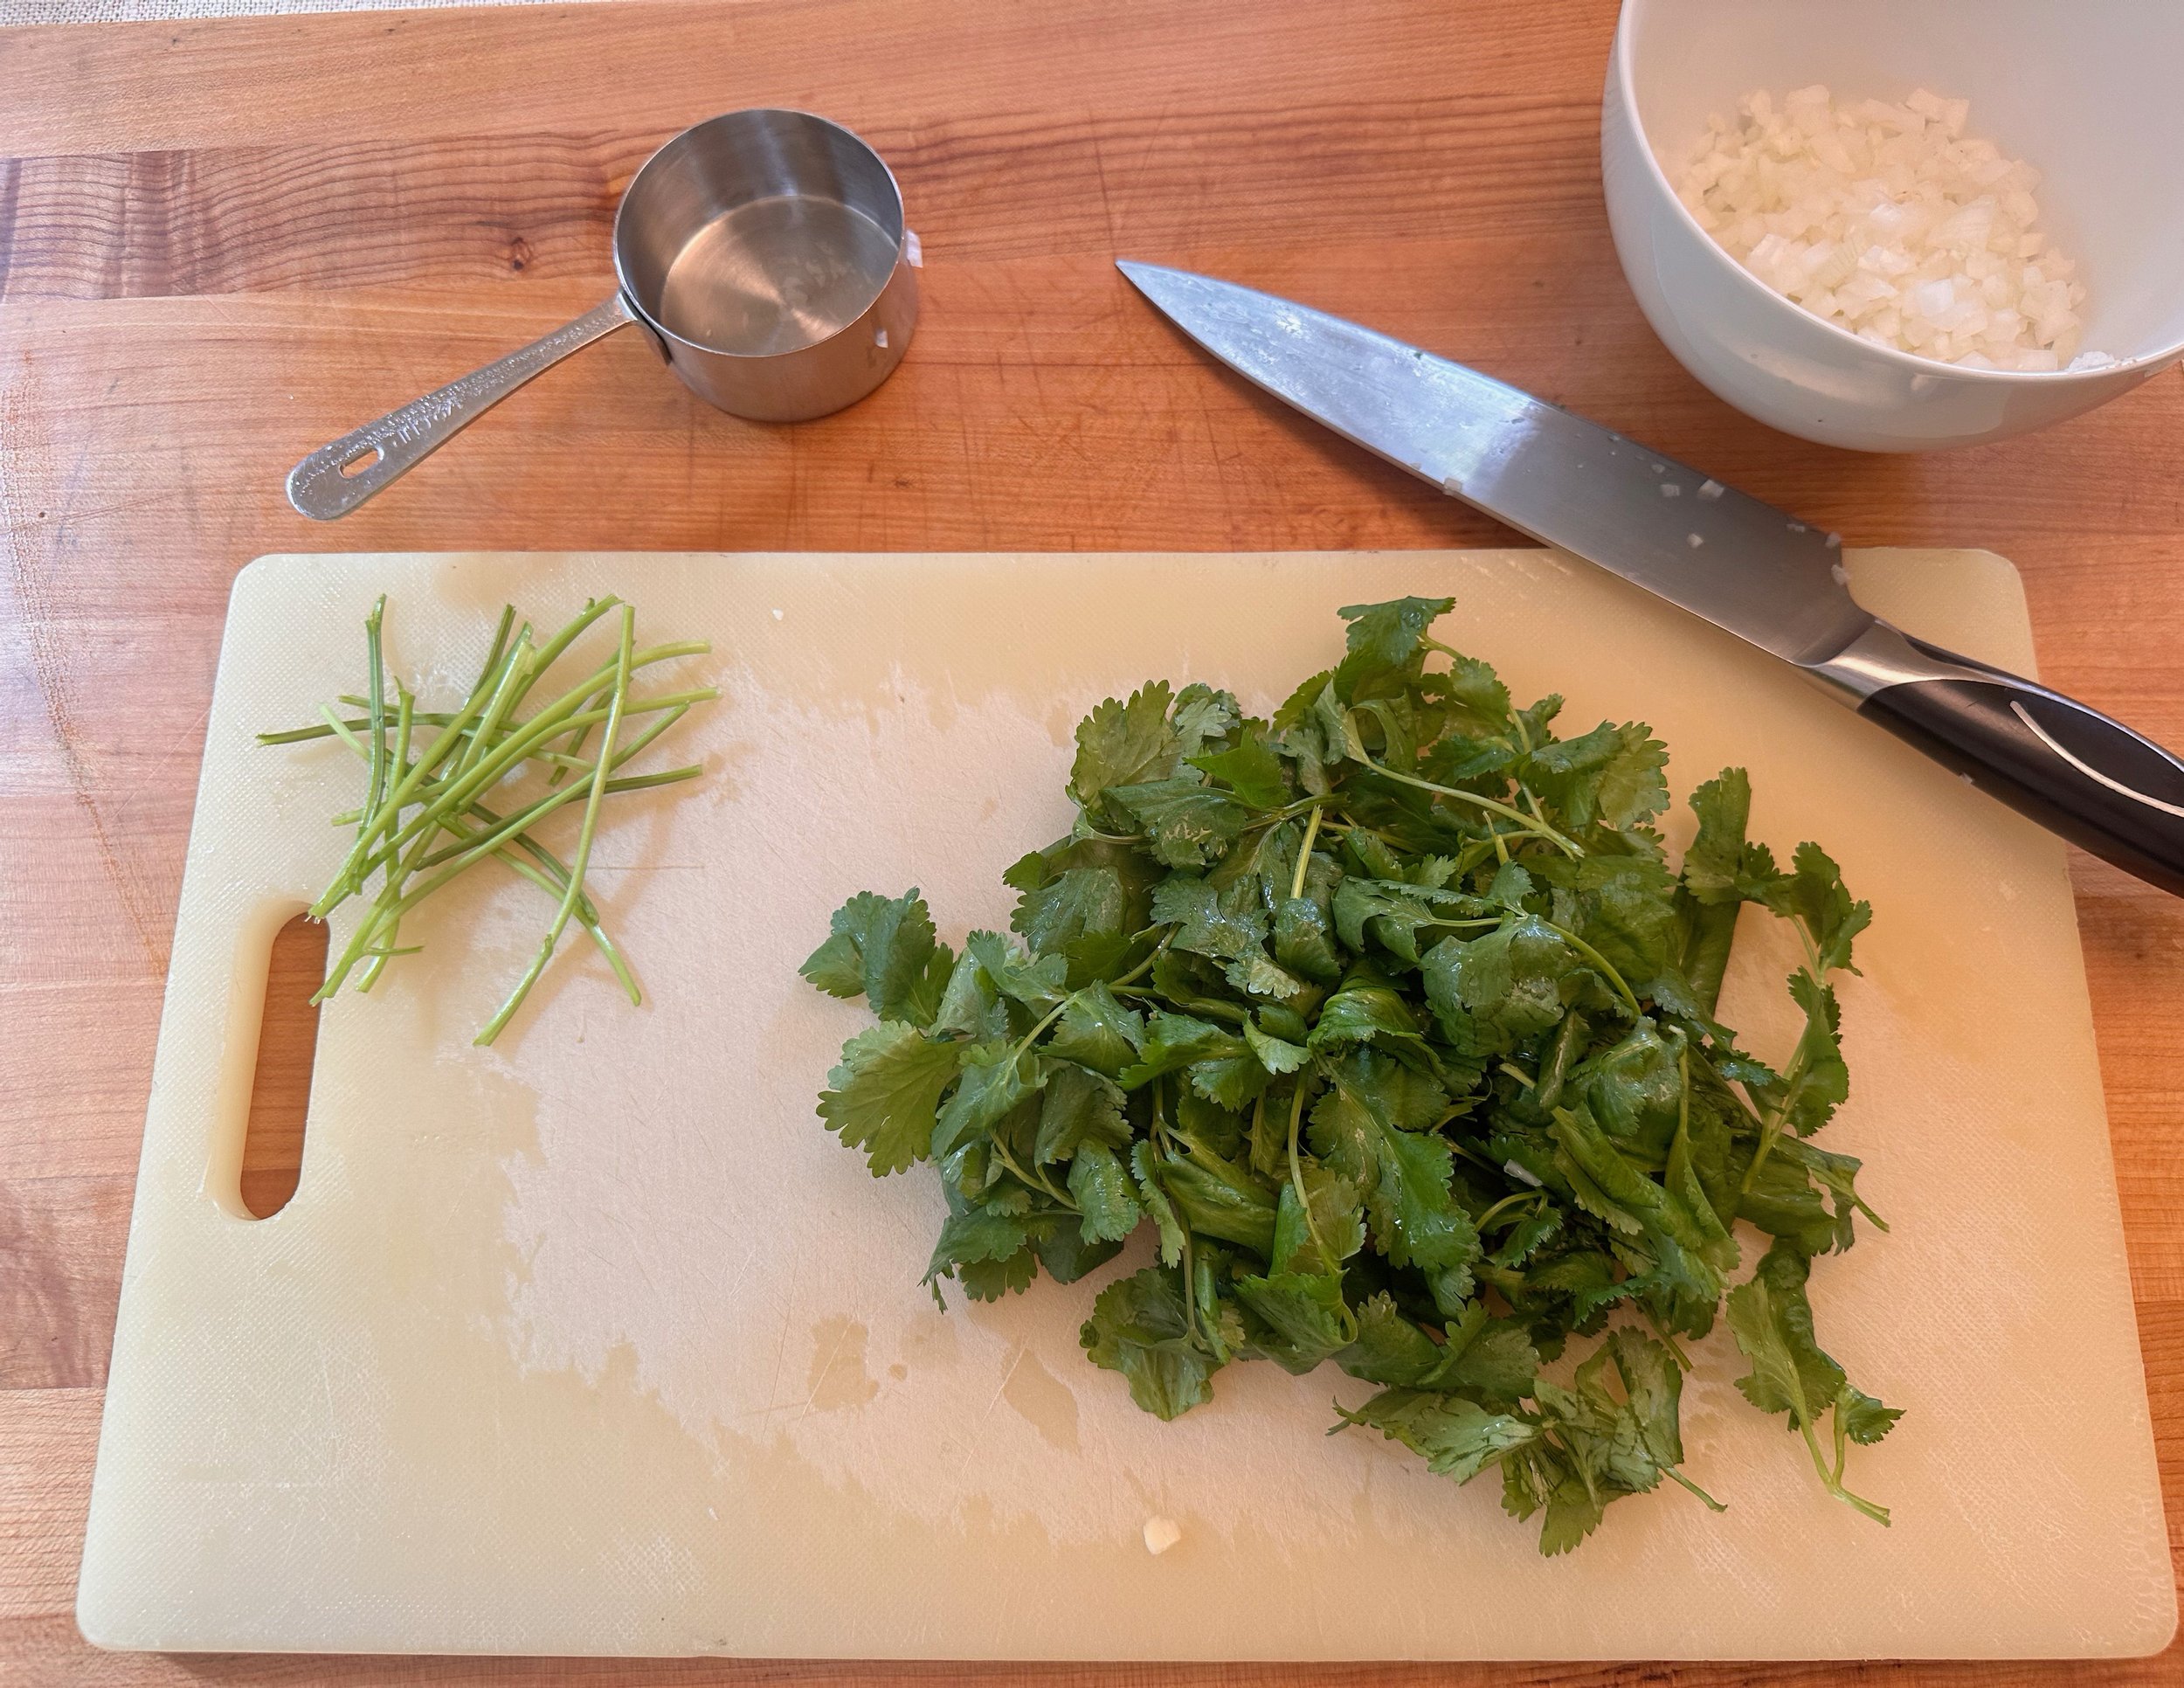
Remove only the large stems, the smaller ones will be chopped finely.


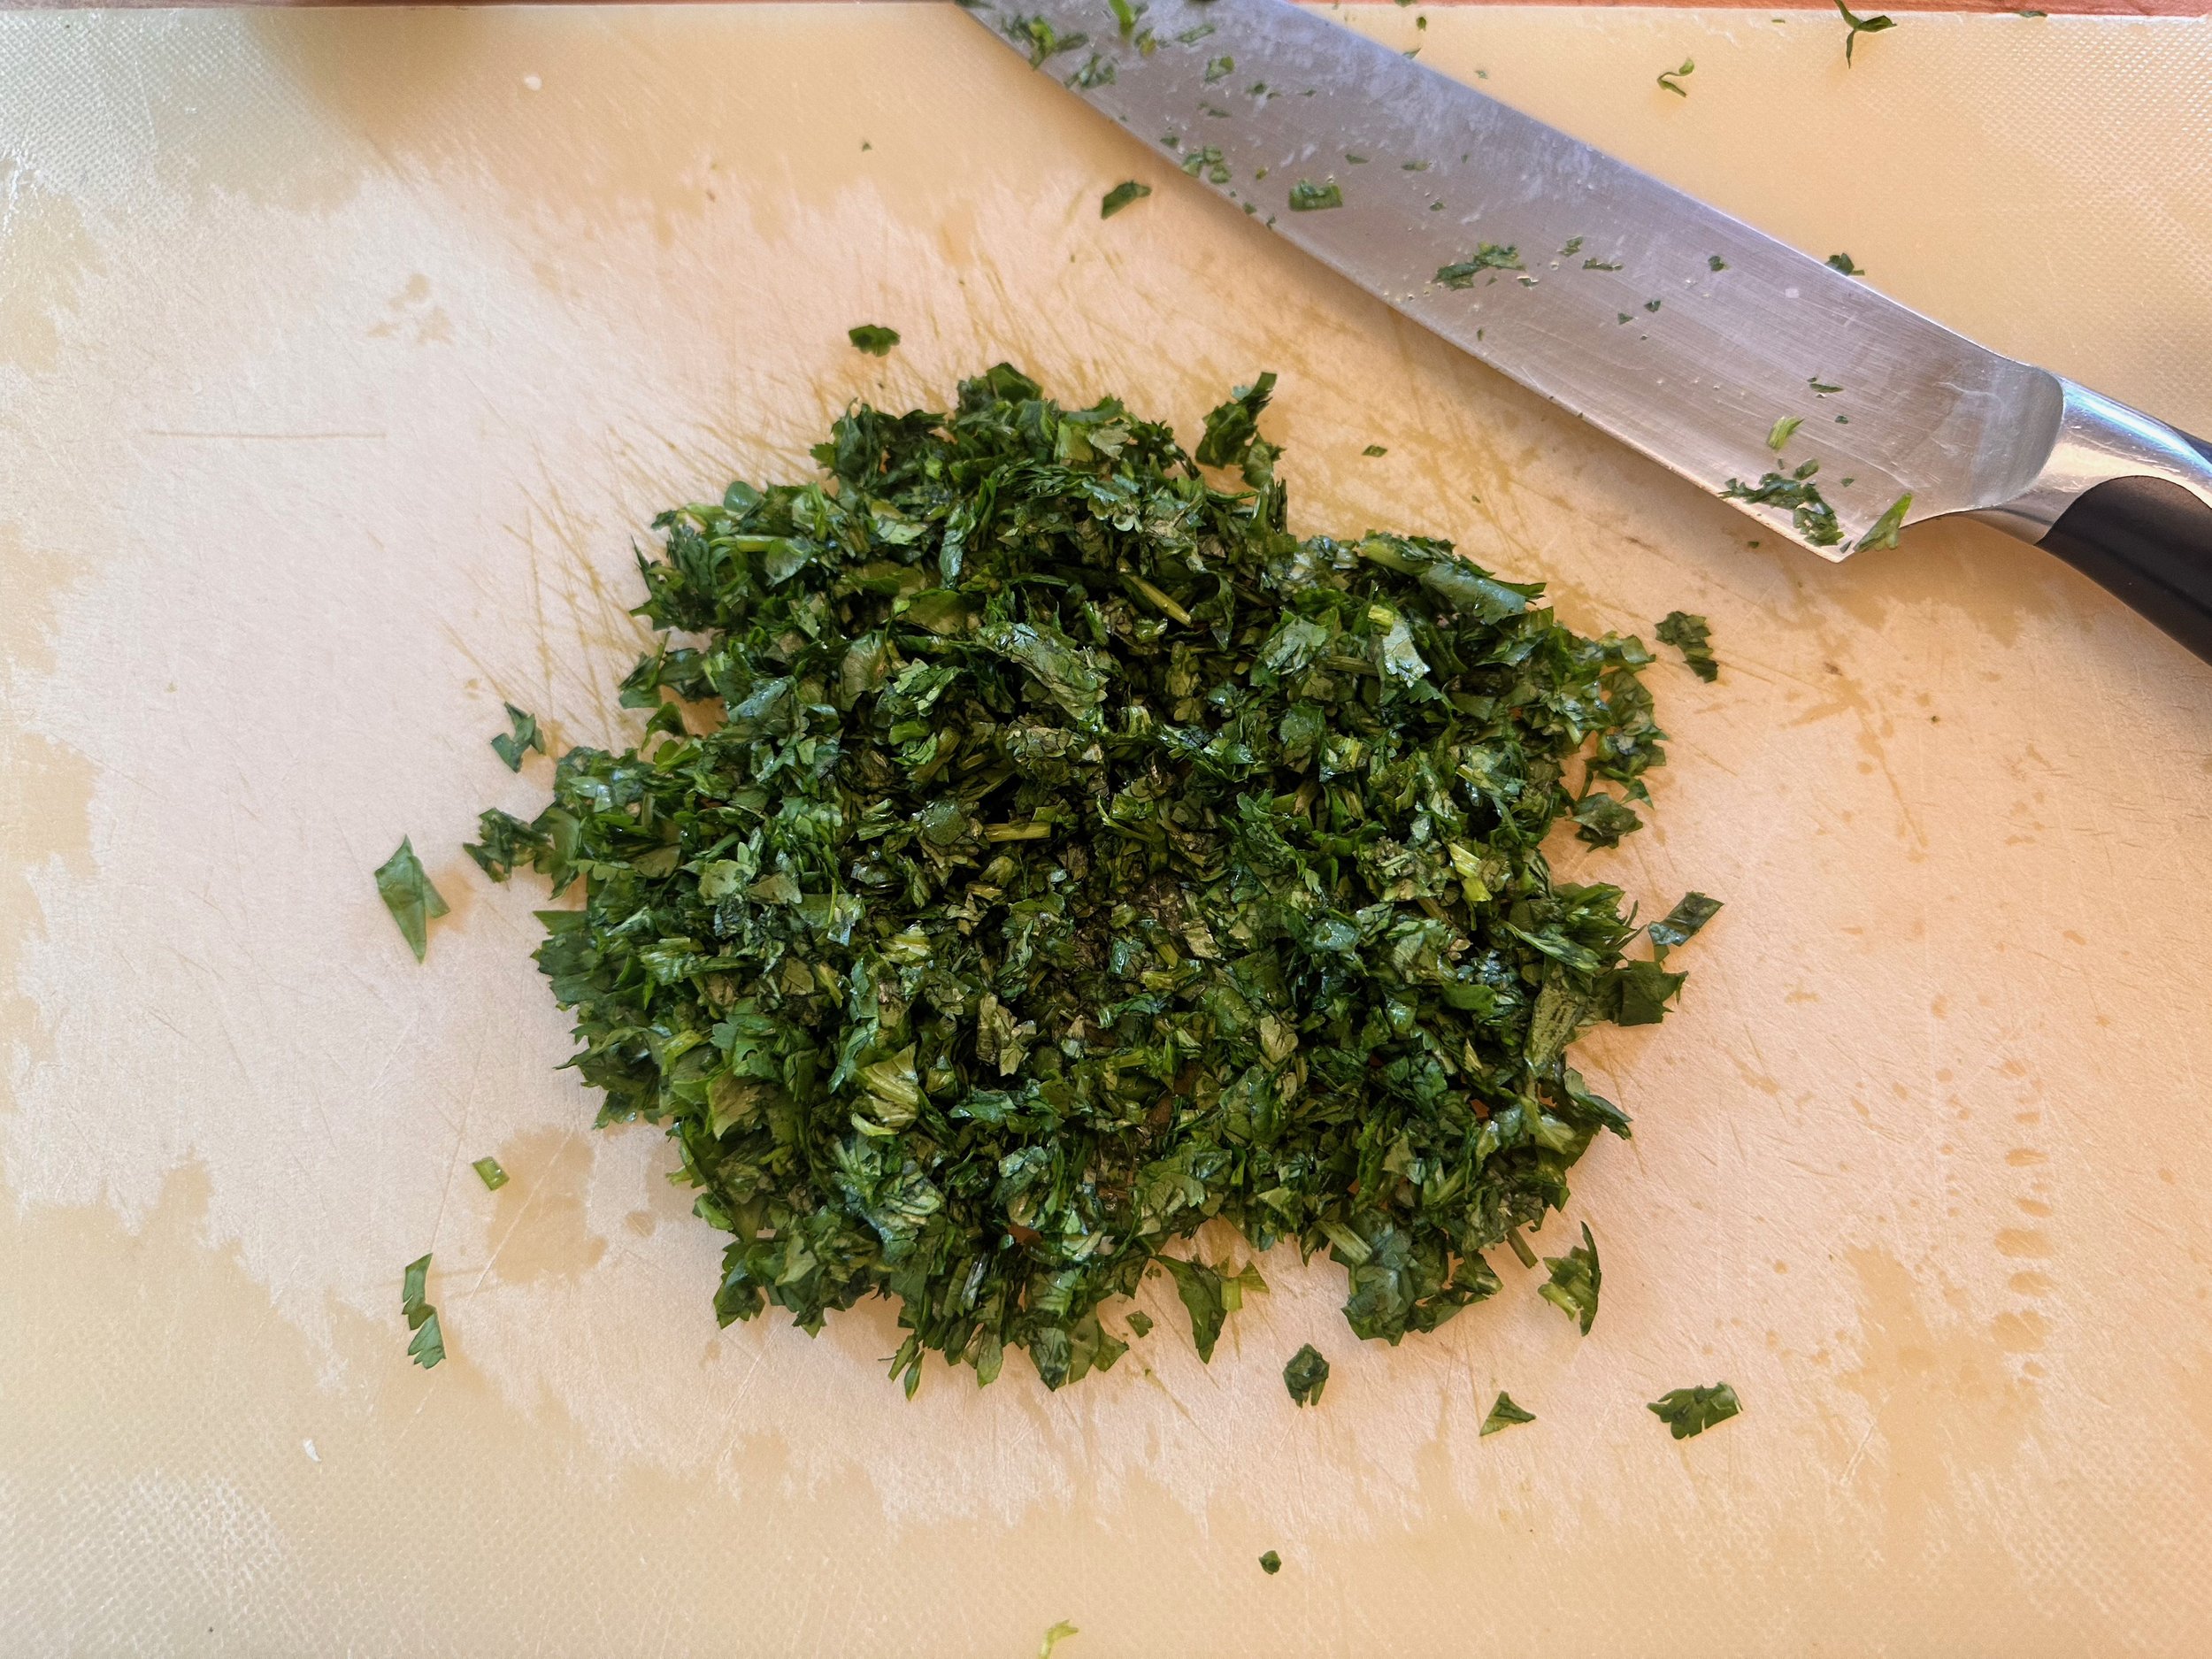
Chop up the cilantro finely.


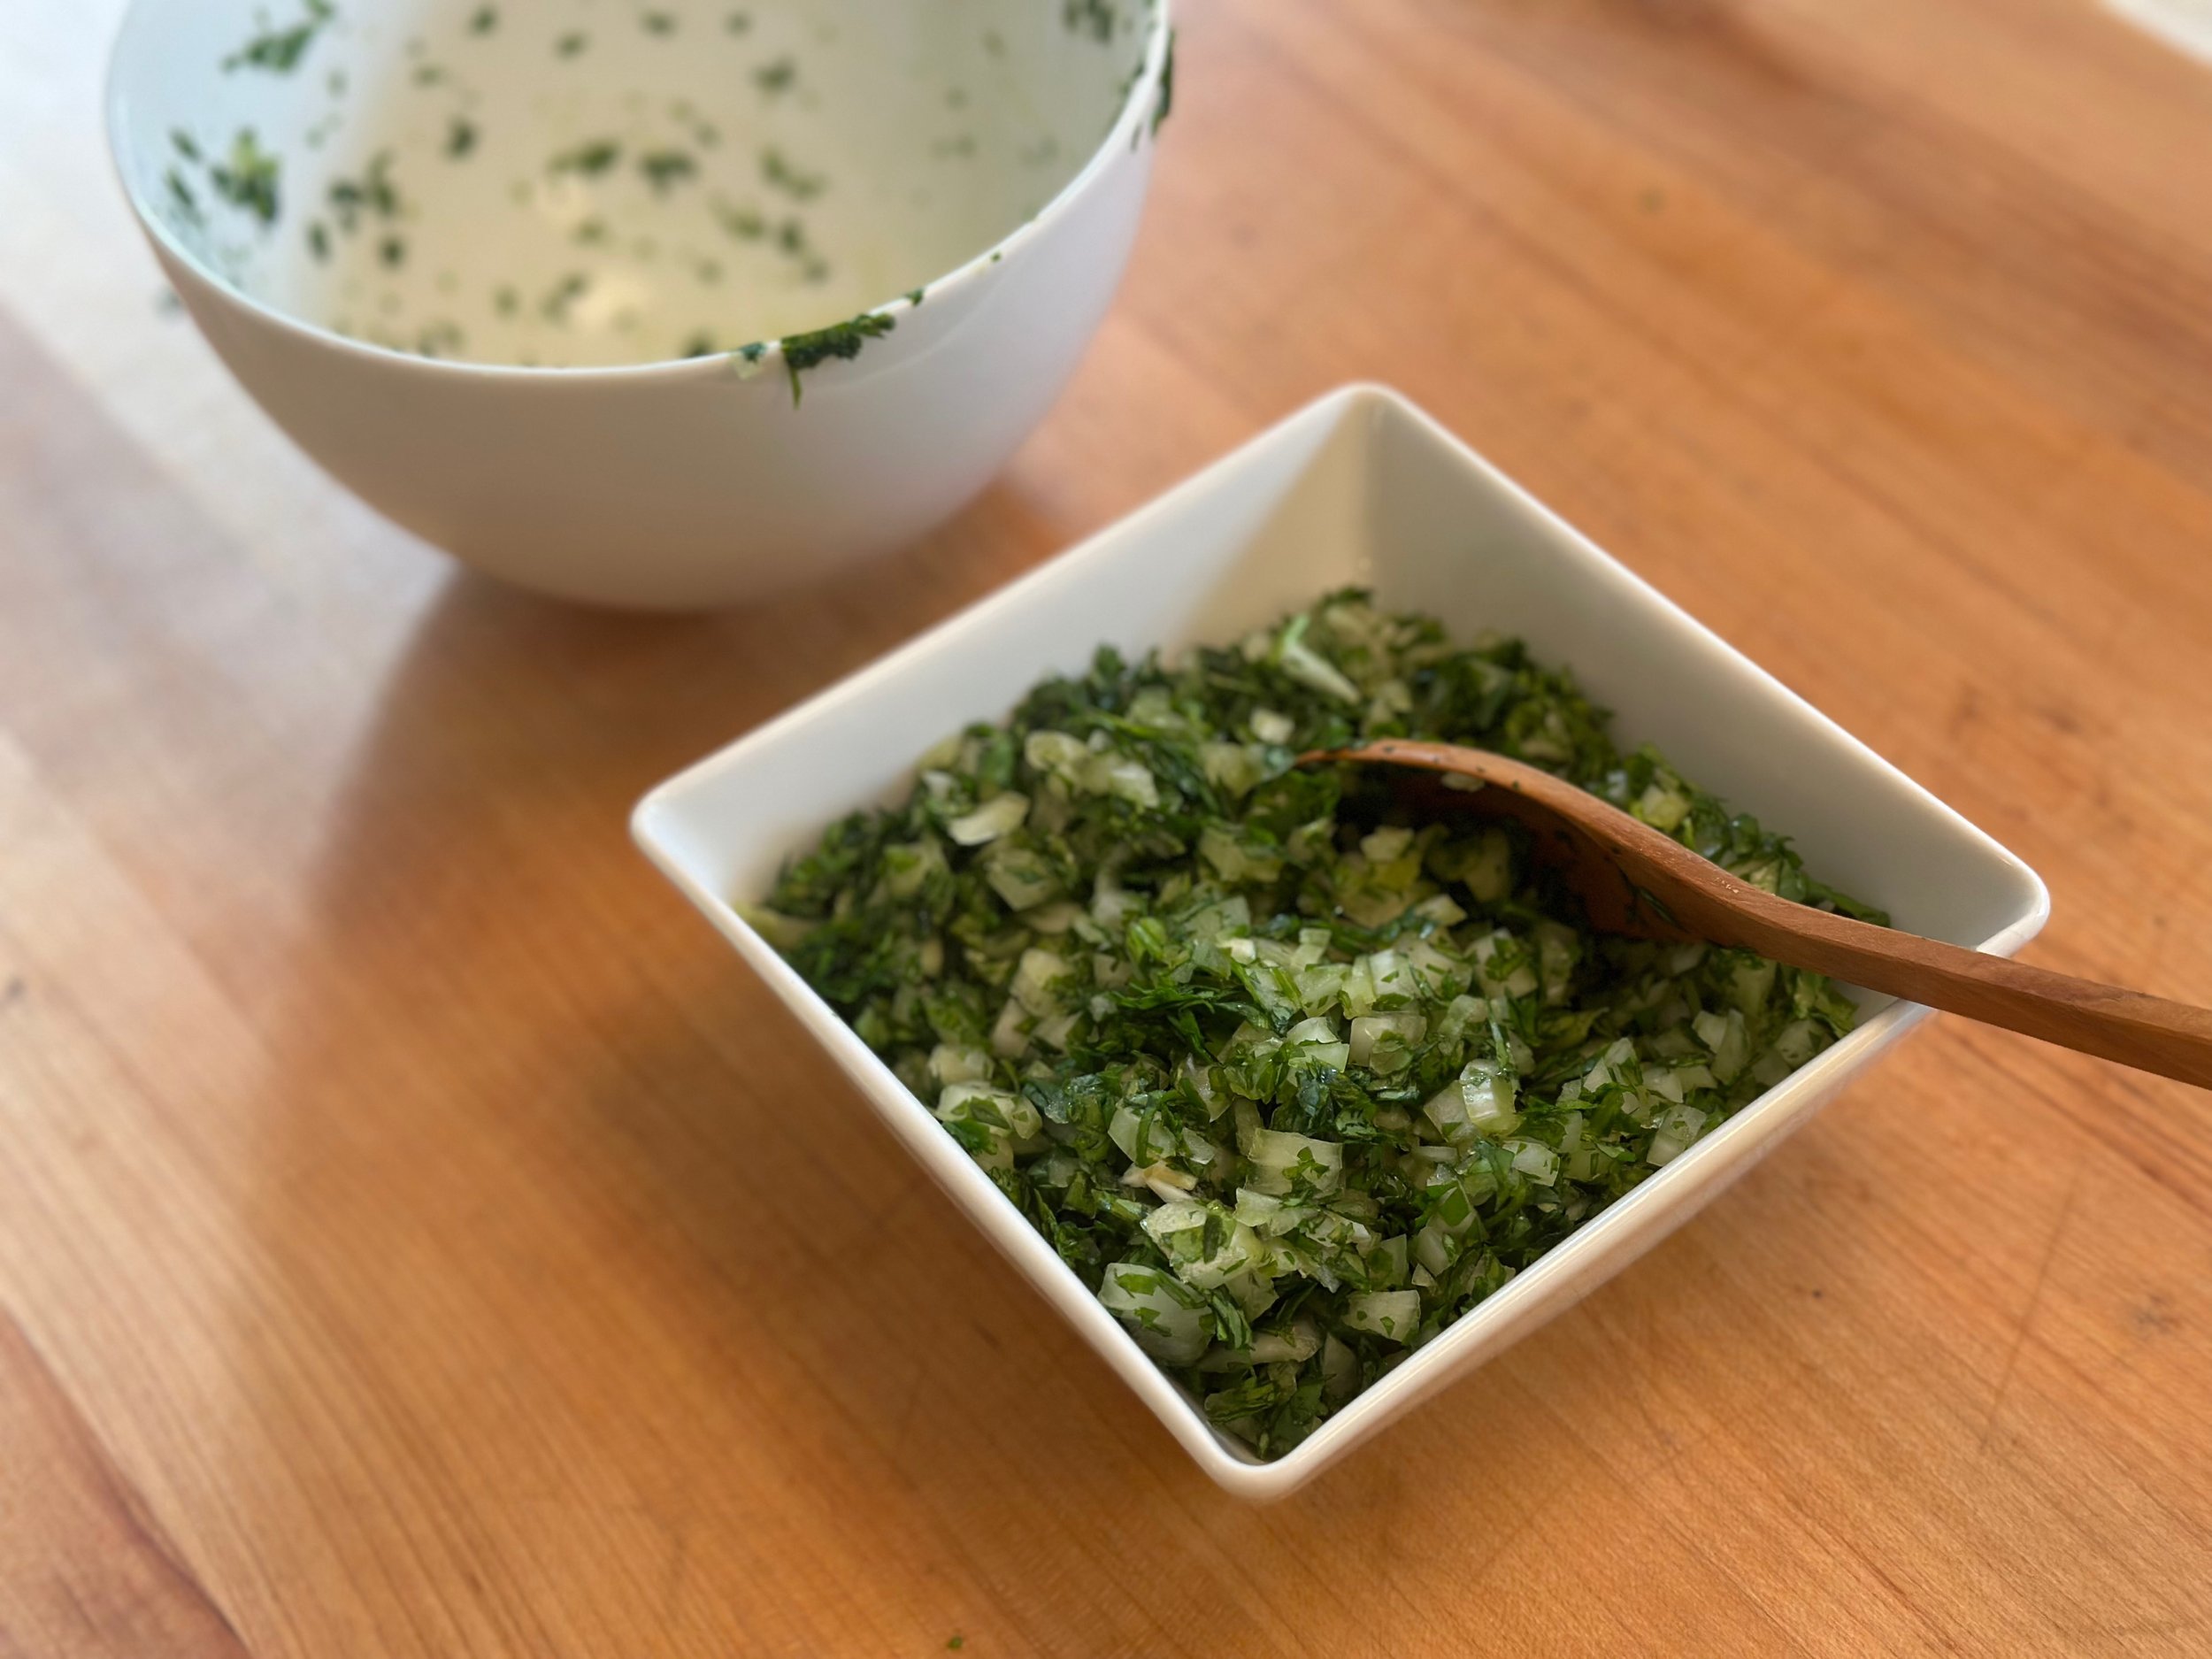
Add the cilantro to the onions and stir to combine.. transfer to a smaller bowl since the bowl you mixed it in is messy looking. Store covered in the fridge till ready to use.


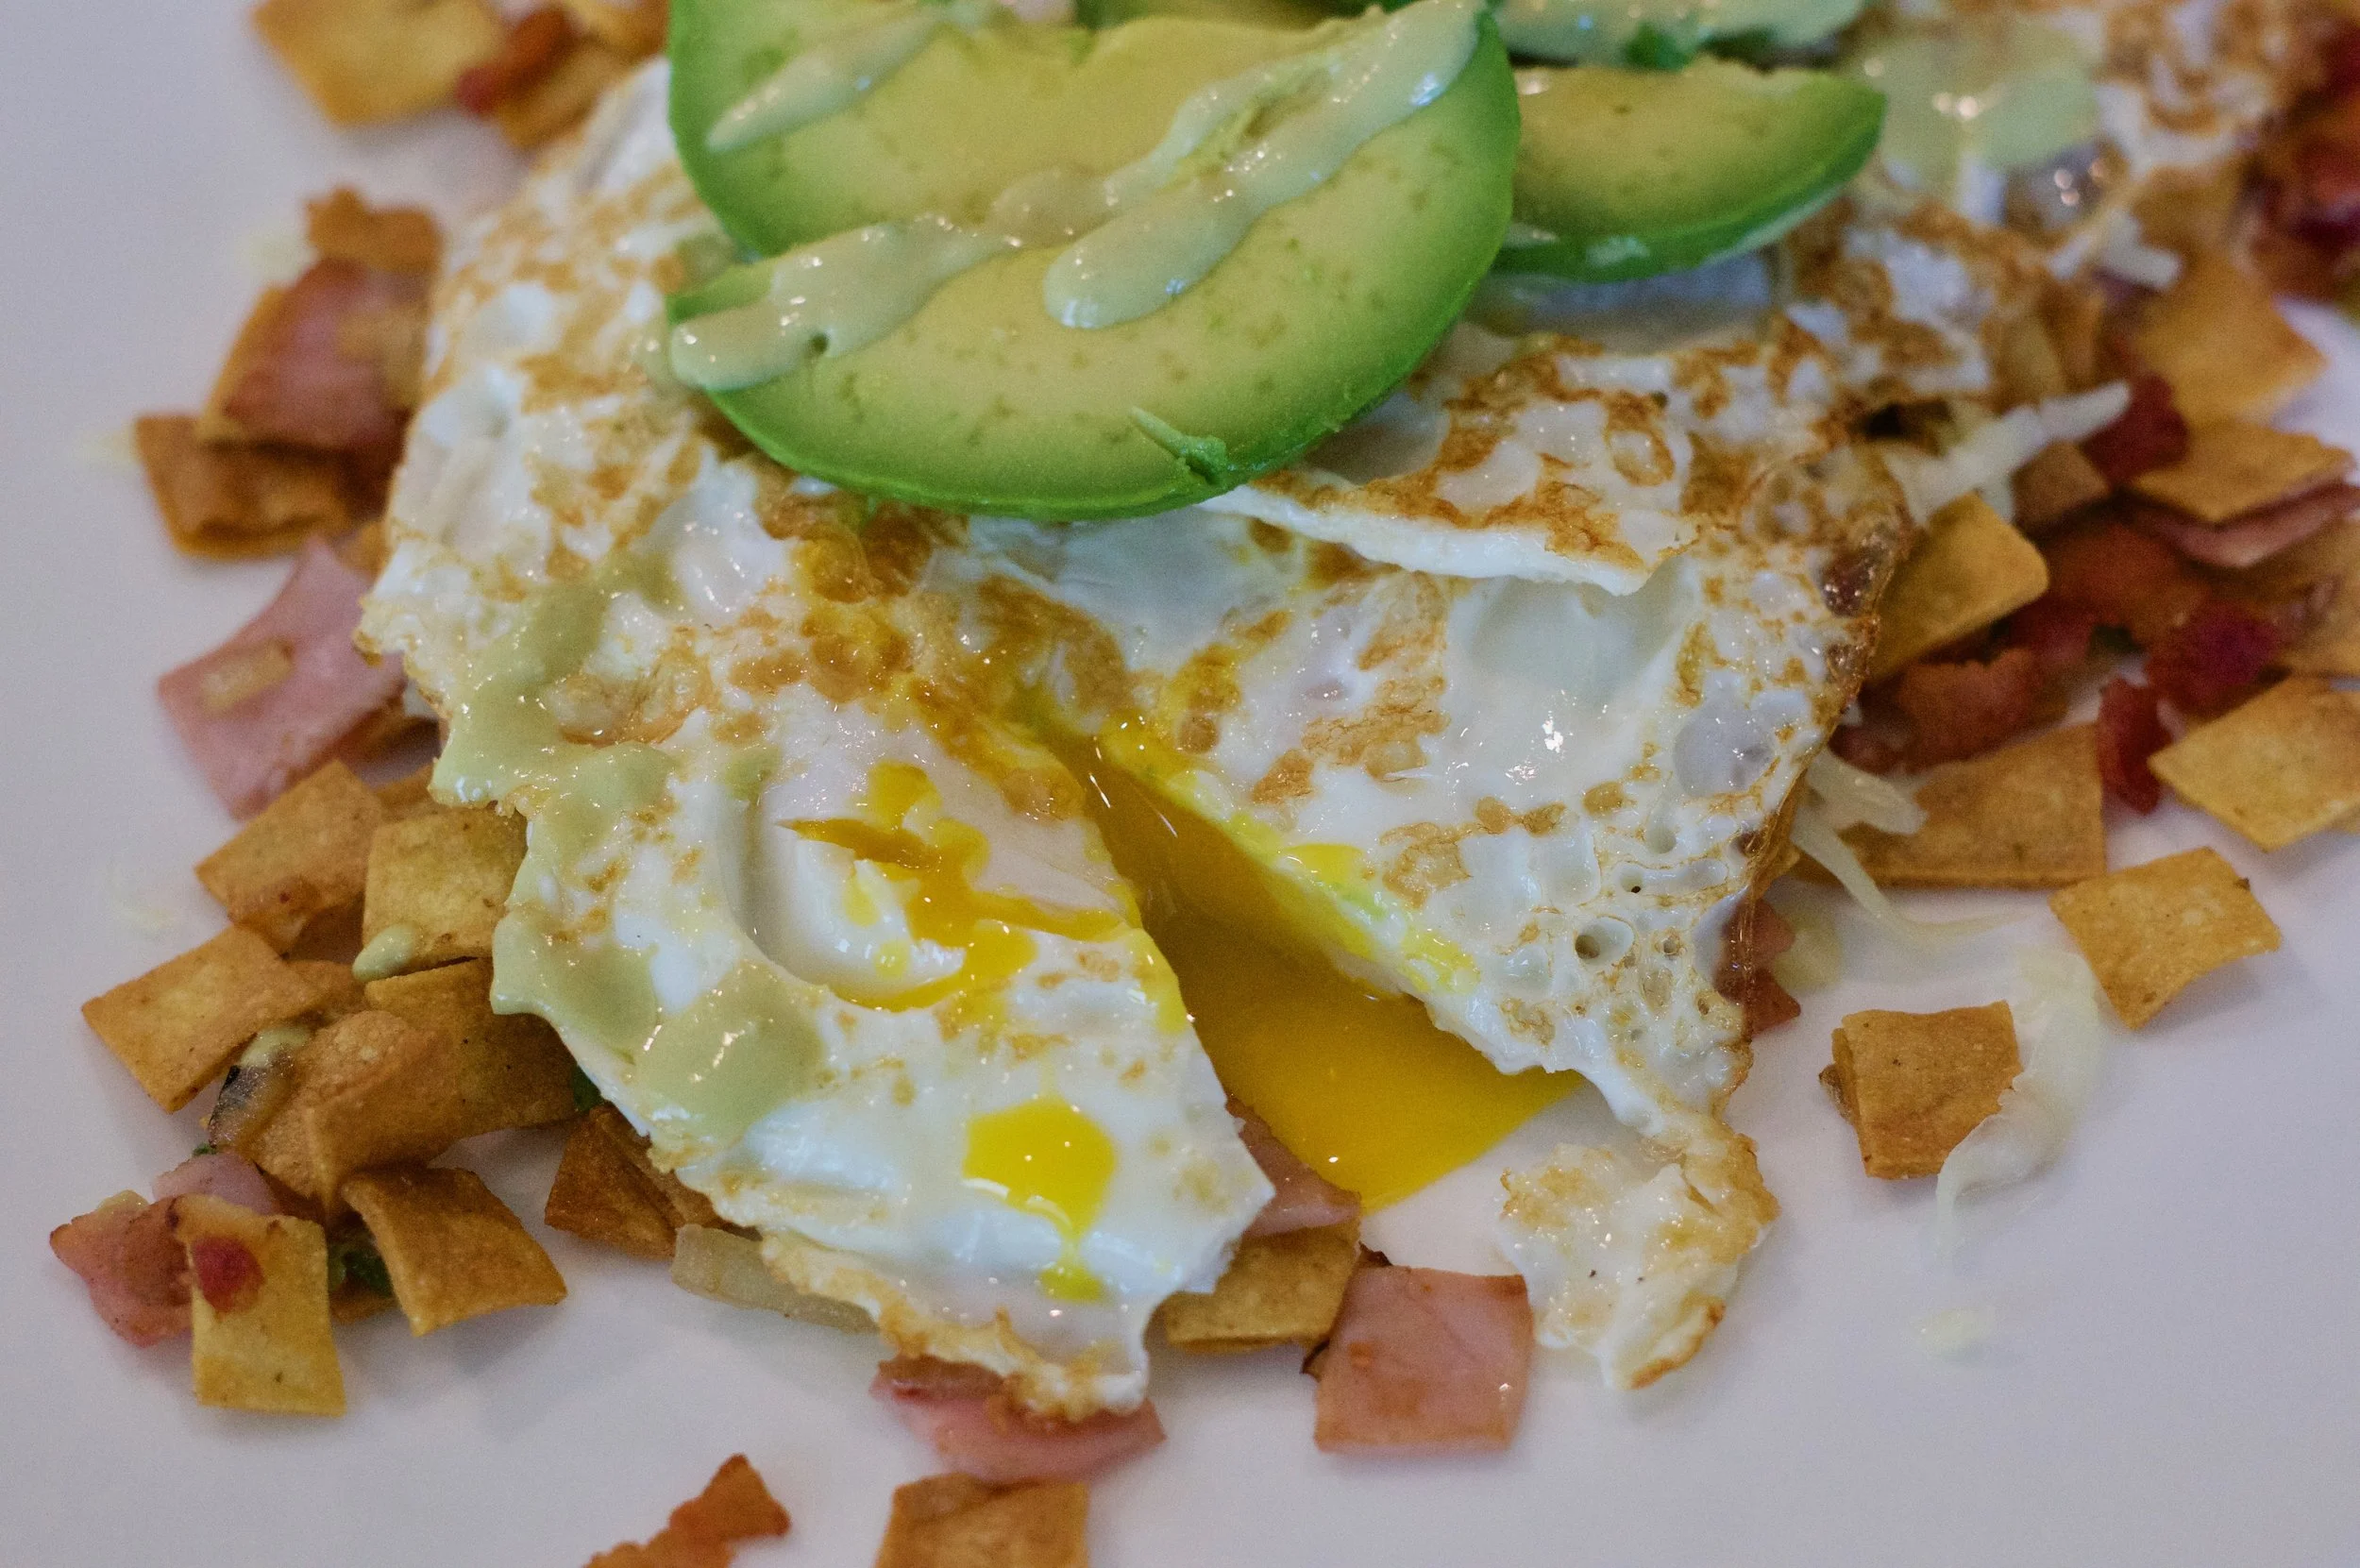
Sprinkle a little olive oil on a flat pan and heat your corn tortillas until warm. Pile on your pork butt, sprinkle with the cilantro/onion mixture, top with avocado slices and top with my Creamy Jalapeno Salsa (The recipe is also on my blog here).


Enjoy!


SLOW COOKED PORK TACOS RECIPE


Serves: 2 people
Prep Time: 15 minutes
Cook Time: 5 Minutes

INGREDIENTS

  • 1/2 Large White Onion, super finely chopped

  • Handful of Cilantro, finely chopped

  • 4-6 Tortillas (2-3 per person)

  • 1 Avocado, sliced

  • My “Creamy Jalapeno Salsa”

  • My “Slow Cooked Pork Butt”

PREPARATION

  1. Prepare the Slow Cooked Pork Butt (on my blog here)

  2. Once pork has cooked, chop pork into small pieces, you need about 1 1/2 cups for 4-6 tacos.

  3. Slice one large white onion into super fine dices. Put onion in medium bowl.

  4. Remove large stems from cilantro and chop up a handful of cilantro. Add cilantro to onions mixture and combine,

  5. Transfer cilantro/onion mixture to a smaller neater bowl.

  6. Slice Avocado.

  7. Heat up pan with a sprinkle of olive oil on medium high heat. Heat tortillas till soft.

  8. Place pork, then cilantro/onion mixture on tortilla and top with avocado slices and my Creamy Jalapeno Salsa.


PRINT RECIPE


In Main Course, Mexican

CREAMY JALAPENO SALSA

June 2, 2020 Julie Sanchez
DSC06090.jpg

It is hard to believe there are only 4 ingredients in this very creamy and very spicy salsa. If you have ever eaten at Taco Deli in Austin, you know they are famous for their amazing salsas, including a sauce called Salsa Dona which I could literally lick off my plate. This recipe is my take on a salsa that really makes everything you put it on taste better. I make it every week, and my husband does not eat any meal without pulling out this sauce. If you do not like spicy hot things, you should walk away now.


DSC06015.jpg

You only need 4 ingredients….jalapenos, garlic, olive oil, and salt. The recipe calls for 5 jalapenos, but the jalapenos pictured above were really big so I only used 4. This is corona virus time and I have my groceries delivered so you get what you get.


DSC06019.jpg

Snap off stems off the jalapenos, peel garlic and cover all with water in a medium saucepan. Bring to a boil, once boiling reduce heat to medium high and cook for 25 minutes or until jalapenos are tender. Half way through the cooking process flip the jalapenos over; since they float you need to roll them over so they can cook through both sides.


DSC06022.jpg

Remove jalapenos and garlic from the pan and place them in a blender. Add salt and 1 tablespoon olive oil. Start on a low speed and work up to a high speed blending for at least one minute. Scrape down sides of blender and blend once again on the highest blender setting. Test thickness of sauce and add additional second tablespoon of olive oil if needed. You do not want the sauce to be too thin, you want to be able to dip a chip and it clings to the chip.


DSC06027.jpg

I like to put my jalapeno sauce in a squirt bottle that I purchased from HEB. The squirt bottle makes it easy to squirt sauce on your eggs, your enchiladas, or if you are like my husband, you can put it on everything!


DSC06103.jpg

We can not eat eggs without drizzling jalapeno salsa on top!


DSC06029.jpg

Once you try dipping your chips into this creamy spicy sauce you will be addicted like we are.


CREAMY JALAPENO SAUCE RECIPE


Serves: 6 people at one sitting, or 2 people all week
Prep Time: 5 minutes
Cooking Time: 25 minutes

INGREDIENTS

  • 5 jalapenos

  • 3 cloves of garlic

  • 1/2 teaspoon salt

  • 2 tablespoons olive oil

PREPARATION

  1. In a medium saucepan, place the jalapenos (stems snapped off) and peeled garlic cloves and cover with water.

  2. Bring to a boil, then reduce heat to medium high. After 15 minutes flip the jalapenos over, since they float they will only cook on one side. Cook for 25 minutes total or until jalapenos are tender and their color changes to a dull green.

  3. Remove the jalapenos and garlic from the pan and place in a blender. Add the salt and 1 tablespoon of the olive oil. Blend on low speed and work up to a high speed. Blend for 1 minute. Scrape down the sides of the blender, and test for thickness of the salsa. If it is too thick add the 2nd tablespoon of olive oil and blend till smooth and creamy on highest blender setting.

  4. Transfer to a squirt bottle for ease of use.

    Note: Store in the refrigerator. It will keep for 10 days. We like it on eggs, on our fish, really any and everything.


PRINT RECIPE


In Sauce, Mexican

ROBERTO'S MIGAS

July 4, 2018 Julie Sanchez
DSC04318 (1).jpg

On the weekends, we love to wake up late and prepare a substantial breakfast. Crisp tortillas with onions and cheese... topped with runny eggs, it doesn't get much better than that. Traditional migas are made with scrambled eggs, which we still make if we are serving a crowd, but my husband Roberto invented this version, which I find keeps the tortillas more crunchy, and the runny yolk creates a sauce which I love.


DSC04265.jpg

I prefer nitrate free bacon and ham. You also need corn tortillas, eggs, avocado, jalapeno, onion, and Monterey jack cheese.


DSC04276.jpg

Chop the jalapeno finely. If you can not take the heat, use only half the jalapeno or you can remove the spicy seeds before you chop it. We chop up the entire jalapeno; we are professionals in taking the heat! Add the jalapeno to a small bowl.


DSC04278.jpg

Cut the onion in half; save the other half for another use. Peel the onion, cut it down lengthways, and then finely chop the onion. Add to the jalapeno mixture in a small bowl.


DSC04288.jpg

Stack the corn tortillas and cut one direction, then the other to create cubes. Set aside in a small bowl.


DSC04267.jpg

If you stack the ham, it tends to stick together even when you saute it. Cut the ham into cubes. Place in a small bowl.


DSC04269.jpg

You can stack the bacon, since it will break up with you fry it. Place in a small bowl.


DSC04292.jpg

Your prep work is complete.


DSC04294.jpg

In a small skillet, add 1/4 cup of olive oil. Turn on to medium heat and add the bacon. Fry gently till the bacon lardons have browned. Stirring occaisonally.


DSC04295.jpg

Remove the bacon with a slotted spoon on to paper towels to drain. Add the tortillas to the oil mixture.


DSC04296.jpg

Saute the tortillas till lightly brown and crispy. It will take about 3-4 minutes, stirring often. Remove with a slotted spoon to paper towels to drain. Pour almost all the oil into a small bowl to discard later.


DSC04299.jpg

Add the onions and jalapenos with the little bit of oil remaining in the pan. Saute till the onions have softened.


DSC04302.jpg

Add the ham, and stir till the ham as heated through. Turn off the heat and set the pan aside.


I use a grill pan to fry my eggs, I cook them on medium heat, flip them and try to keep the yolk runny. Traditionally you scramble eggs for migas, and if I have a large crowd of people I do scramble the eggs. We just prefer the soft yolks running all into the tortilla mixture.


Combine the tortillas and bacon into the pan with the sauteed onions and stir to combine. Place on to plates. Sprinkle with the cheese, and place 2 eggs on each plate. Top with avocado and tomatillo sauce or red sauce (both recipes are on this blog).


DSC04314.jpg

If you want push the easy button, you can purchase Taco Deli's Salsa Dona from Whole Foods in the refrigerated section of the produce isle. I buy it weekly and put it in a squirt bottle. If you are from Austin, you know how good this basically just jalapeno and garlic sauce is. Very hot and very good!


DSC04320.jpg

I had to add more one photo, its just so beautiful to me.


DSC04328.jpg

Enjoy!


ROBERTO'S MIGAS RECIPE


Serves: 2 people
Prep Time: 15 minutes
Cooking Time: 15 minutes


INGREDIENTS

  • 1 jalapeno, diced finely (remove seeds if you're not a Texan)
  • 1/2 medium onion, finely chopped
  • 4 corn tortillas, cut into cubes
  • 2 slices of ham, chopped
  • 3 sliced of bacon, cut into lardons
  • 1/4 cup olive oil
  • 4 eggs
  • 1/4 cup Monterey jack cheese, grated
  • sliced avocado

preparation

  1. Dice the jalapeno finely. If you are concerned about the heat, remove the seeds or use only half the jalapeno. Add to a small bowl.
  2. Cut the onion in half, save the other half for another use.  Peel and finely dice the onion. Add to the jalapeno mixture.
  3. Slice the ham into cubes. Place in a small bowl.
  4. Stack the bacon and cut into thin slices (lardons). Place in a small bowl.
  5. In a small saute or omelet pan add 1/4 cup oil and turn burner to medium heat. Add the bacon and saute till lightly browned and crispy. Stirring occasionally. Once cooked, remove with a slotted spoon and place on paper towels to drain.
  6. Add the tortillas to the oil mixture, stir occasionally. It should take 3-4 minutes for the tortillas to become crispy and slightly golden. Remove with a slotted spoon onto paper towels to drain.
  7. Drain almost all the oil from the pan into a small bowl to discard later. Save about 2 teaspoons of oil in the pan.
  8. Place the pan back on the medium heat and saute the onions and jalapenos till the onions have softened.
  9. Add the ham and stir till heated through. Turn off heat and set aside.
  10. Use a griddle pan or large saute pan to fry your eggs. Turn on medium/medium high heat. Wait for the pan to become hot, sprinkle in a little olive oil and fry the eggs. Flip the eggs and remove before the yolk becomes hard.
  11. Add the tortillas and bacon to the onion mixture, stir to combine and place equal amounts on each plate.
  12. Top with the grated cheese and 2 eggs. Garnish with avocado slices.

Note: Migas are also great served with my refried black beans. (Recipe is here) 

Note: If you prefer scrambled eggs, simply scramble your eggs, then add the tortilla mixture and cheese to your eggs, stir to combine and serve.


PRINT RECIPE


In Breakfast, Mexican

GUILT FREE REFRIED BLACK BEANS

December 13, 2017 Julie Sanchez
DSC03915.jpg

I should call these pureed black beans, because that is what they really are. The traditional way to make refried beans is to puree the beans and then heat them in lard or bacon fat. I have skipped this unnecessary and unhealthy step, because there is no need to add any fat to these beans. They are creamy and smooth and you can eat as much as you want guilt free.  Our housekeeper Candy, taught me how to make these beans back in 1990, when my son Chris was still a baby. This was his first food and his first spoken word. He loved these beans and we did too. Christopher is 28 years old now and his love of refried beans has never wavered.


DSC03839.jpg

I like the organic 1 pound bag of black beans from Trader Joe's. You must soak the beans overnight or do a quick soak. Directions for both methods are on the package. The jalapeno does not make the beans spicy, it just gives the beans added flavor.


DSC03849.jpg

Once you have soaked and rinsed the beans you add the beans back into a large pot, and add the onion, jalapeno, cilantro and garlic. Then add 7 cups of water and bring to a boil. Reduce heat to medium and cover.


DSC03896.jpg

Once the beans have simmered for 2 1/2 hours your can let them cool or you can carefully blend them in the blender while they are hot. Use a slotted spoon to remove the beans, onions, etc. from the pan. Pour the remaining liquid in a measuring cup and reserve 1 1/2 cups to add if needed to the beans as you blend them. Add your salt and carefully blend the beans till smooth and creamy, adding more liquid till you achieve the consistency you prefer. I prefer creamier beans, like the ones they serve at Taco Deli. I believe most places serve refried beans that are too dry. Be careful and allow steam to escape from the lid so you do not have a blender explosion.


DSC03905.jpg

I always freeze half the beans for later. These HEB brand containers (see below) are perfect for storing your beans.


DSC03907.jpg

I love these Quart containers from HEB. I use them to freeze soup and beans and also to store my salsas, and leftovers in the fridge. These have a screw on lid so they will not spill and they can stack on top of each other.  They are also great for taking foods to friends, since they are so inexpensive, your friends do not need to return the container. 


DSC03946 (1).jpg

Your family will be so impressed with your homemade Mexican food. It may become a Christmas Eve tradition like it is in our family. I have been making chicken enchiladas with black beans and rice since my kids were young. We begin our Christmas Eve meal with chili con queso and salsas, (also on my blog) and margaritas of course, and then we devour our enchiladas, rice and beans...muy delicioso!


GUILT FREE REFRIED BLACK BEANS RECIPE


Serves: 8-10 servings
Prep Time: 10 minutes
Cook Time: 2 1/2 Hours

INGREDIENTS

  • 1 pound dried black beans, soaked overnight, drained and rinsed

  • 1 onion, peeled and sliced into quarters

  • 4 cloves garlic, peeled

  • 1 jalapeno

  • 5 sprigs, of cilantro, stems and all

  • 7 cups water

  • 2 1/2 teaspoons salt

PREPARATION

  1. It's important to soak your beans with the overnight method or the quick soak method described on the package. After soaking the beans, drain, and rinse them and put them in a large pot.

  2. Add the onion, garlic, jalapeno, and cilantro and 7 cups of water. (Do not add the salt till after the beans have cooked, otherwise the salt will make the beans tough)

  3. Bring the beans to a boil. Reduce heat to medium and cover.

  4. Cook for 2 1/2 hours. Sample one bean to see if it is squishy enough, if not, cook a little longer.

  5. With a slotted spoon, place the bean mixture in the blender. Then pour the liquid left in the pot into a large measuring cup. Pour all but 1 1/2 cups liquid into the blender. Add the salt and blend till smooth and creamy. Test the consistency and add more liquid as needed. (I prefer a thinner mixture, not a thick mixture.) Be careful blending the hot mixture, open the blender top a little to allow the steam to escape.


Note: These beans freeze well. So I always freeze half the batch for later.

Note: You may garnish the beans with crumbled queso fresco.


PRINT RECIPE


In Mexican, Side Dish

LAURITA'S MEXICAN RICE

December 13, 2017 Julie Sanchez
DSC03941.jpg

My mother in law Laurita, who lives in Monterrey, taught me how to make this rice years ago when she was visiting us here in Houston. We spent the day together cooking rice, cheese enchiladas, and several other Mexican dishes. I learned so much from her that day. We wrote down these family recipes, so that they can be passed down to the next generation. So now you too can cook delicious authentic Mexican rice. It's so easy and so good. To me it tastes like the rice that Ninfa's here in Houston serves but better!

DSC03838.jpg

I like to use a long grain rice, either Jasmine or Basmati is fine. I also love to use Knorr's chicken bouillon (dehyrdated chicken broth) to add flavor to the rice. Knorr's is also great in soups, so it will not go to waste if you buy it. 

DSC03916.jpg

Add 2 cups of water to a blender, then add your tomato, garlic, salt, cumin, lots of black pepper and the chicken bouillon. If you do not have chicken bouillon just add more salt in place of it. Blend till smooth.


DSC03918.jpg

You can prep this stage ahead of time and save the mixture till your ready to begin your rice. 


DSC03924.jpg

Peel your carrot, and chop as finely as possible. Remember you want the carrots to be small in proportion with the rice.


DSC03929.jpg

Chop up the onion as finely as you can, you want to be as small as rice grains.


DSC03932.jpg

Add the onions and carrots to a nonstick medium saucepan. Add your butter and turn heat to high. Cook for 4 minutes, stirring occaisonally. 


DSC03934.jpg

After cooking the onions and carrots for 4 minutes the carrots and onions have now softened. 


DSC03946 (1).jpg

Enjoy!


LAURITA'S MEXICAN RICE RECIPE


Serves: 4 people
Prep Time: 10 minutes
Cooking Time: 35 Minutes

OPTIONAL EQUIPMENT

  • A nonstick pan

INGREDIENTS

  • 1 tomato, sliced into 4 quarters

  • 2 cloves of garlic, peeled

  • 1 1/2 teaspoons ground cumin

  • 1 1/2 teaspoons chicken bouillon

  • 1/2 teaspoon salt

  • freshly ground pepper

  • 2 cups water

  • 1/2 cup carrots (1 medium carrot) chopped finely

  • 3/4 cup onions (1/2 of a medium onion) chopped finely

  • 1 tablespoon butter

  • 1 cup long grain rice

PREPARATION

  1. In a blender combine the quartered tomato, 2 cups water, 2 cloves of garlic, cumin, chicken bouillon, salt, and lots of ground pepper. Blend till smooth and combined.

  2. Cut up your carrots and onions as fine as you can dice them.

  3. Combine the carrots and onions in a medium sauce pan with your butter.

  4. Turn the heat on high and saute the onions and carrots for 4 minutes, stirring occasionally.

  5. After 4 minutes, add your rice and cook for 1 more minute stirring constantly.

  6. Now carefully add your liquid mixture to the rice, the pan is so hot it might sizzle as you put it in.

  7. Let the mixture come to boil. Set the timer for 30 minutes, put the lid on and turn the heat down to medium.

  8. Cook for 30 minutes. Stir before serving.


PRINT RECIPE


In Mexican, Side Dish
Older Posts →