• Home
  • Categories
  • Contact
  • Subscribe
  • About
Menu

Julie's Taste

Street Address
City, State, Zip
Phone Number

Your Custom Text Here

Julie's Taste

  • Home
  • Categories
  • Contact
  • Subscribe
  • About

TOMATILLO SALSA

June 18, 2016 Julie Sanchez

Tomatillo Salsa also known as salsa verde or green sauce is a staple in our home. We make it every week. My husband puts in on almost everything he eats. I love it with chips of course, but I also top it on eggs, on tacos, and on grilled fish. It is also amazing mixed with mayo and spread on your hamburger buns. If you want a creamier salsa, you can add sour cream and an avocado to the salsa. You will then have a salsa that tastes just like the green sauce at Ninfa's restaurant...a Houston landmark that we all love.


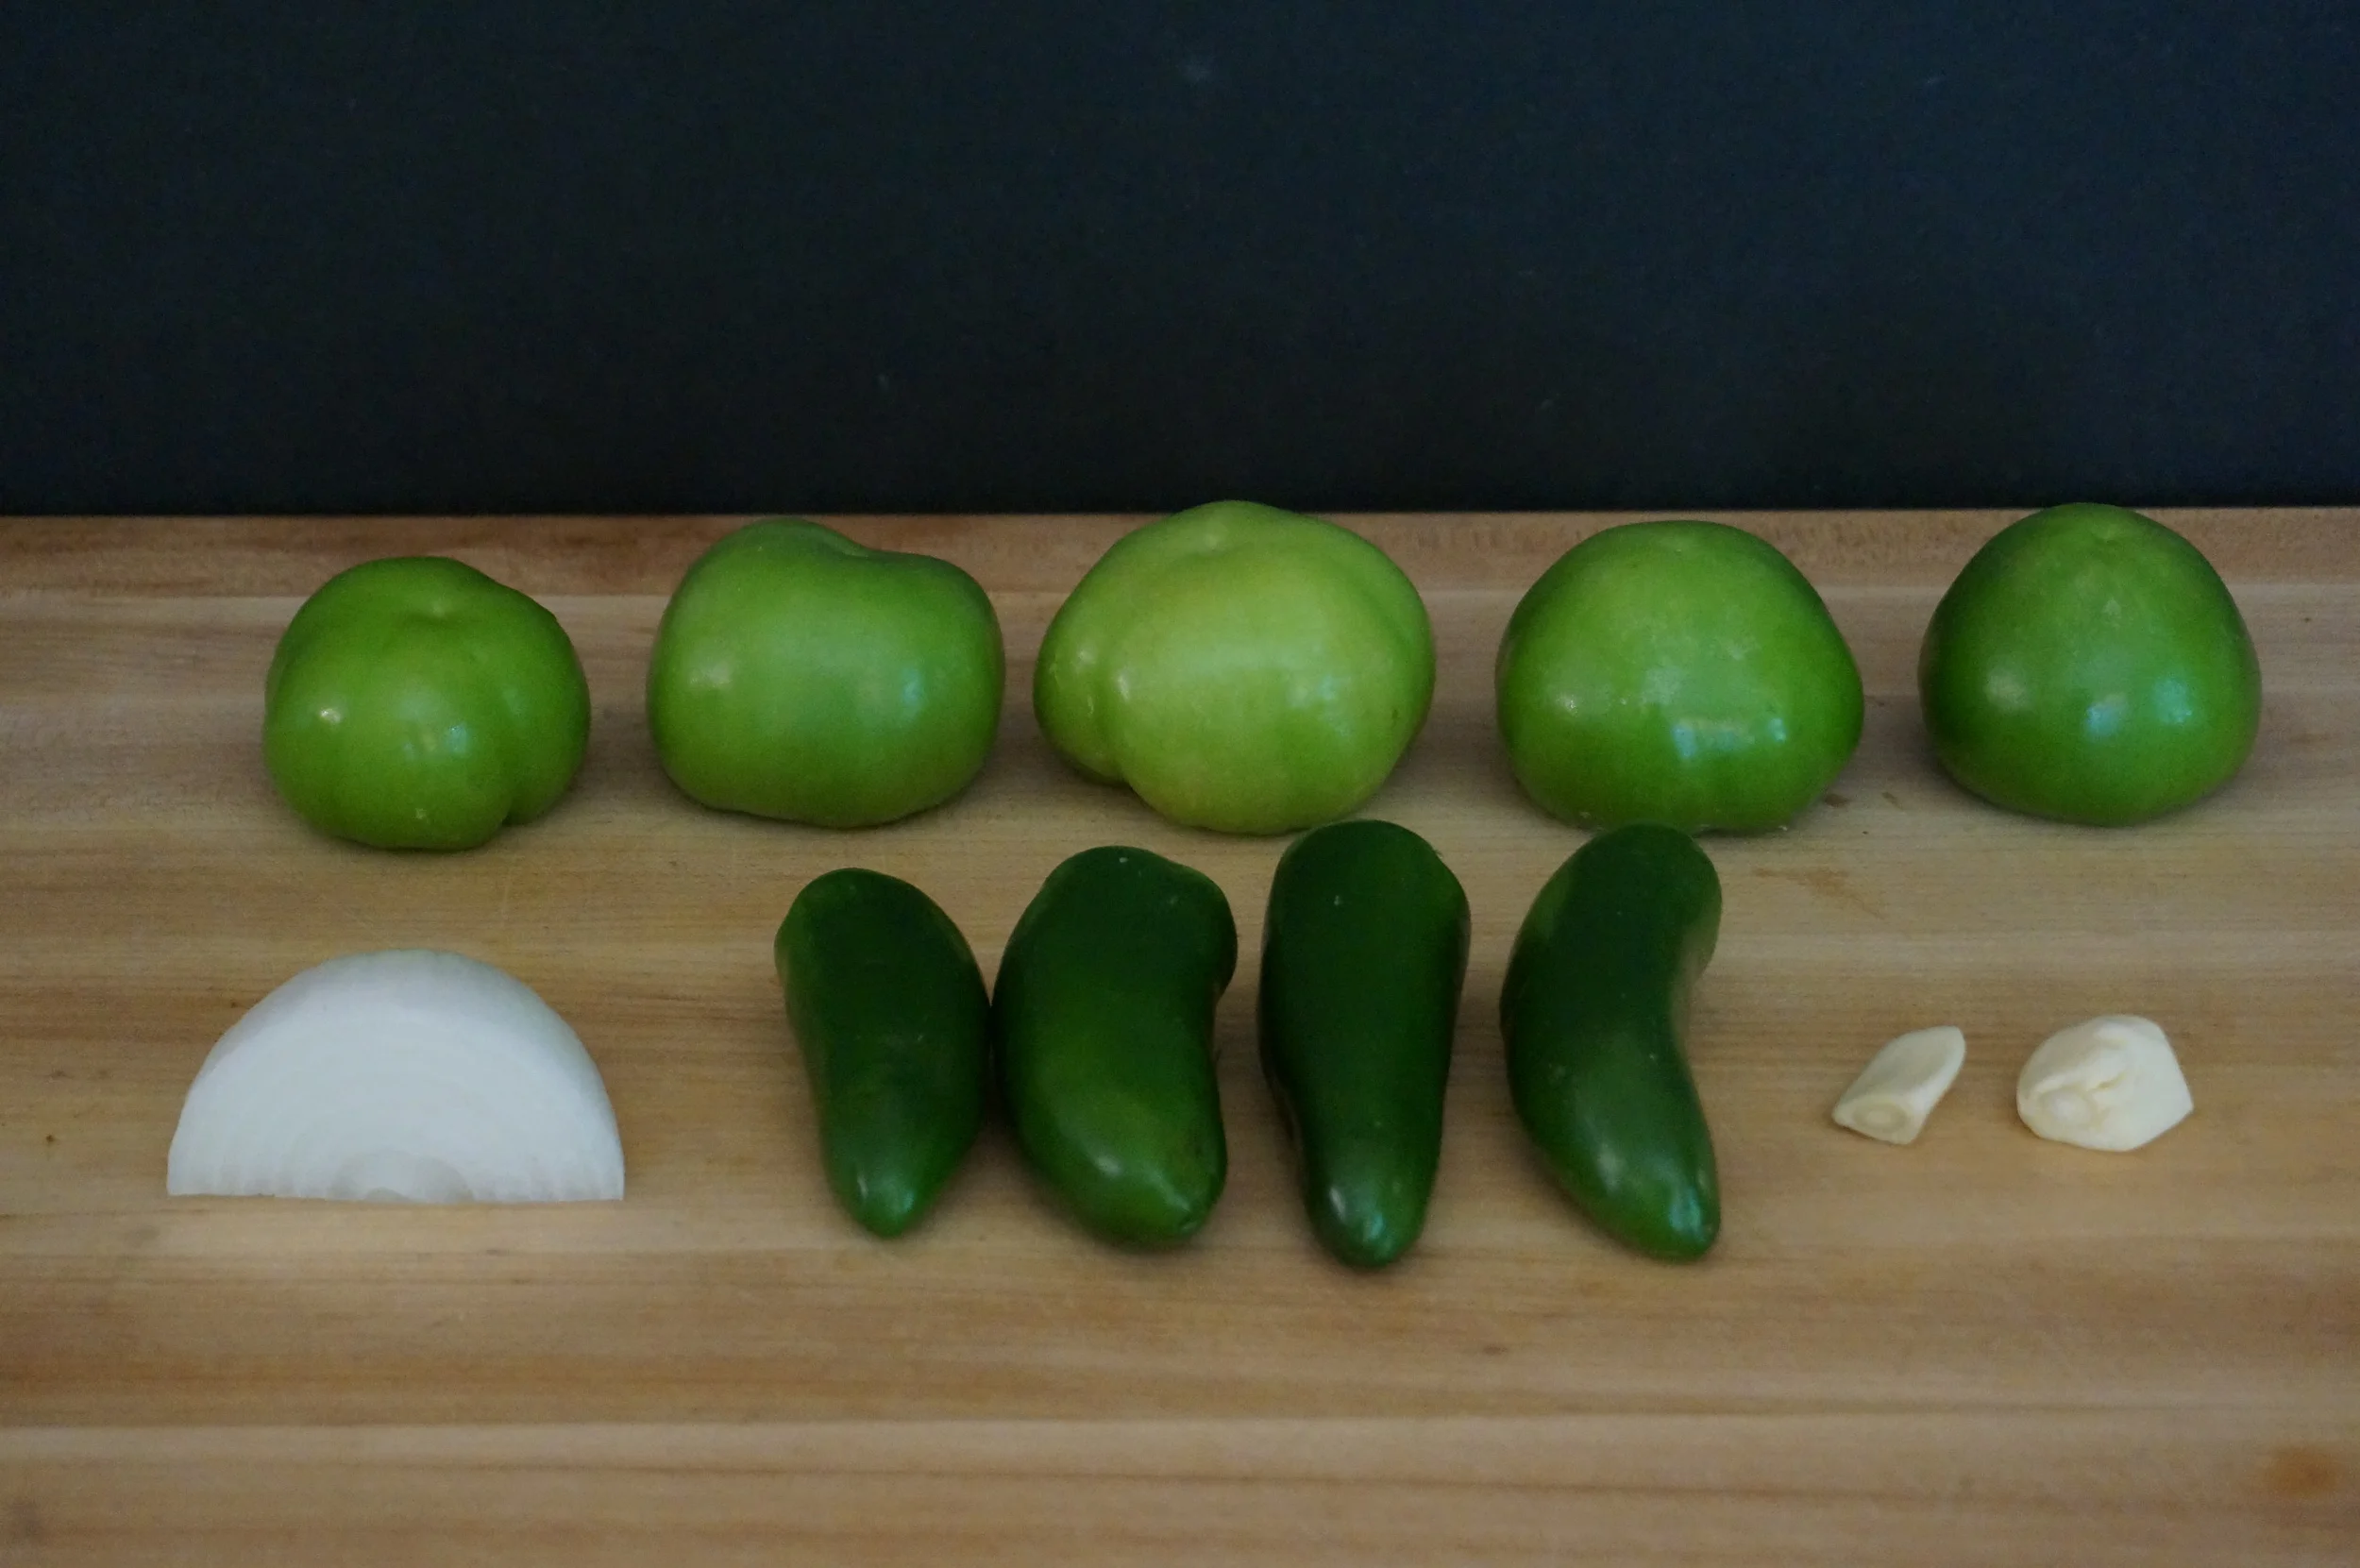
Try to buy tomatillos that are all about the same size. That way they will cook evenly. You probably will only use 2  jalapeños if you have a low threshold for spicy. I usually use 3 or 4 depending on the hotness of the jalapeños. My sons and husband like really hot salsa. When you are blending your salsa, you can add one jalapeño at a time and taste as you go; that way you are in charge of your spicy factor.


These are the same ingredients as above but with the added sour cream and avocado if you are making the creamier green sauce.


The tomatillos have a husk that you need to remove. Sometimes the husk, which is sticky, is difficult to remove. Just run the tomatillo under running water and you can slide it off. You will need to then wash the tomatillos.


Snap the stems off the jalapenos and wash the peppers.


You will only need a quarter of a onion, so cut the onion in half then half again and remove the outside layer of skin.


Peel 2 garlic cloves and then you will be ready to start cooking your salsa.


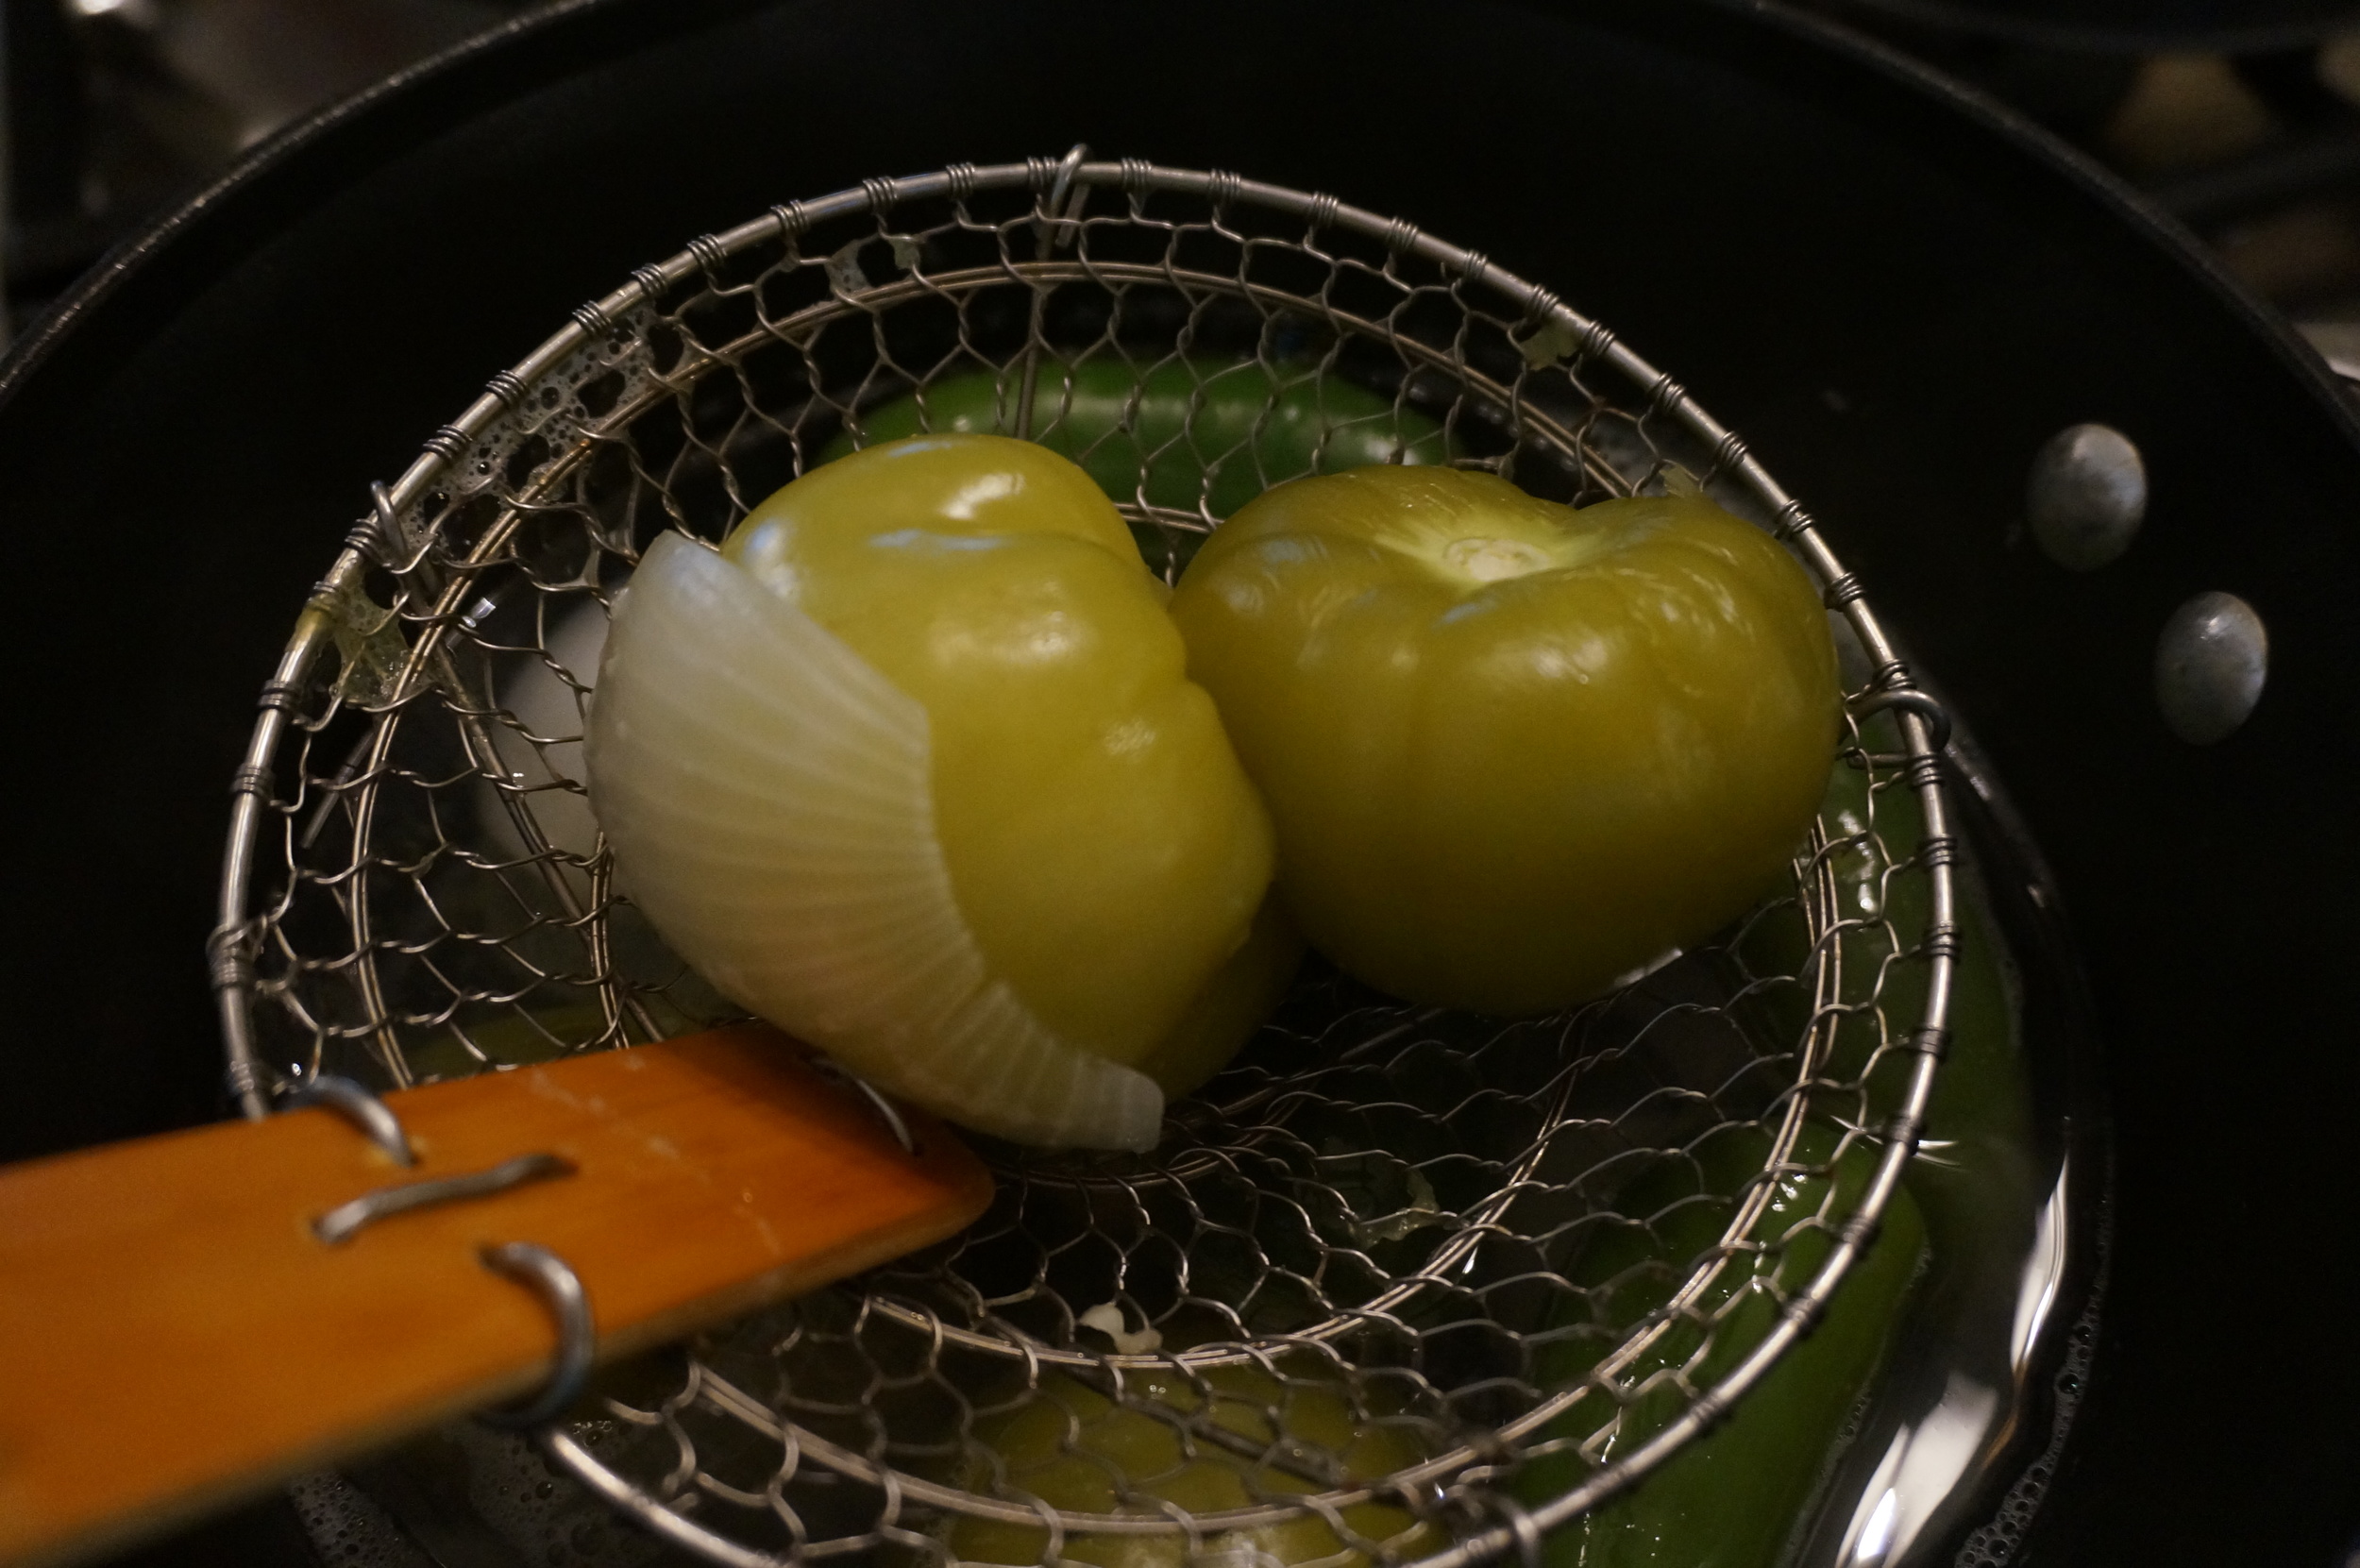
Place the tomatillos, jalapenos, onion, and garlic in a medium pan and cover the vegetables with water. The vegetables will float, which is why my photo looks like I do not have enough water. Turn the burner on high and let the mixture come to a boil. Set your timer for 10 minutes and reduce the heat to medium high so that the mixture simmers.


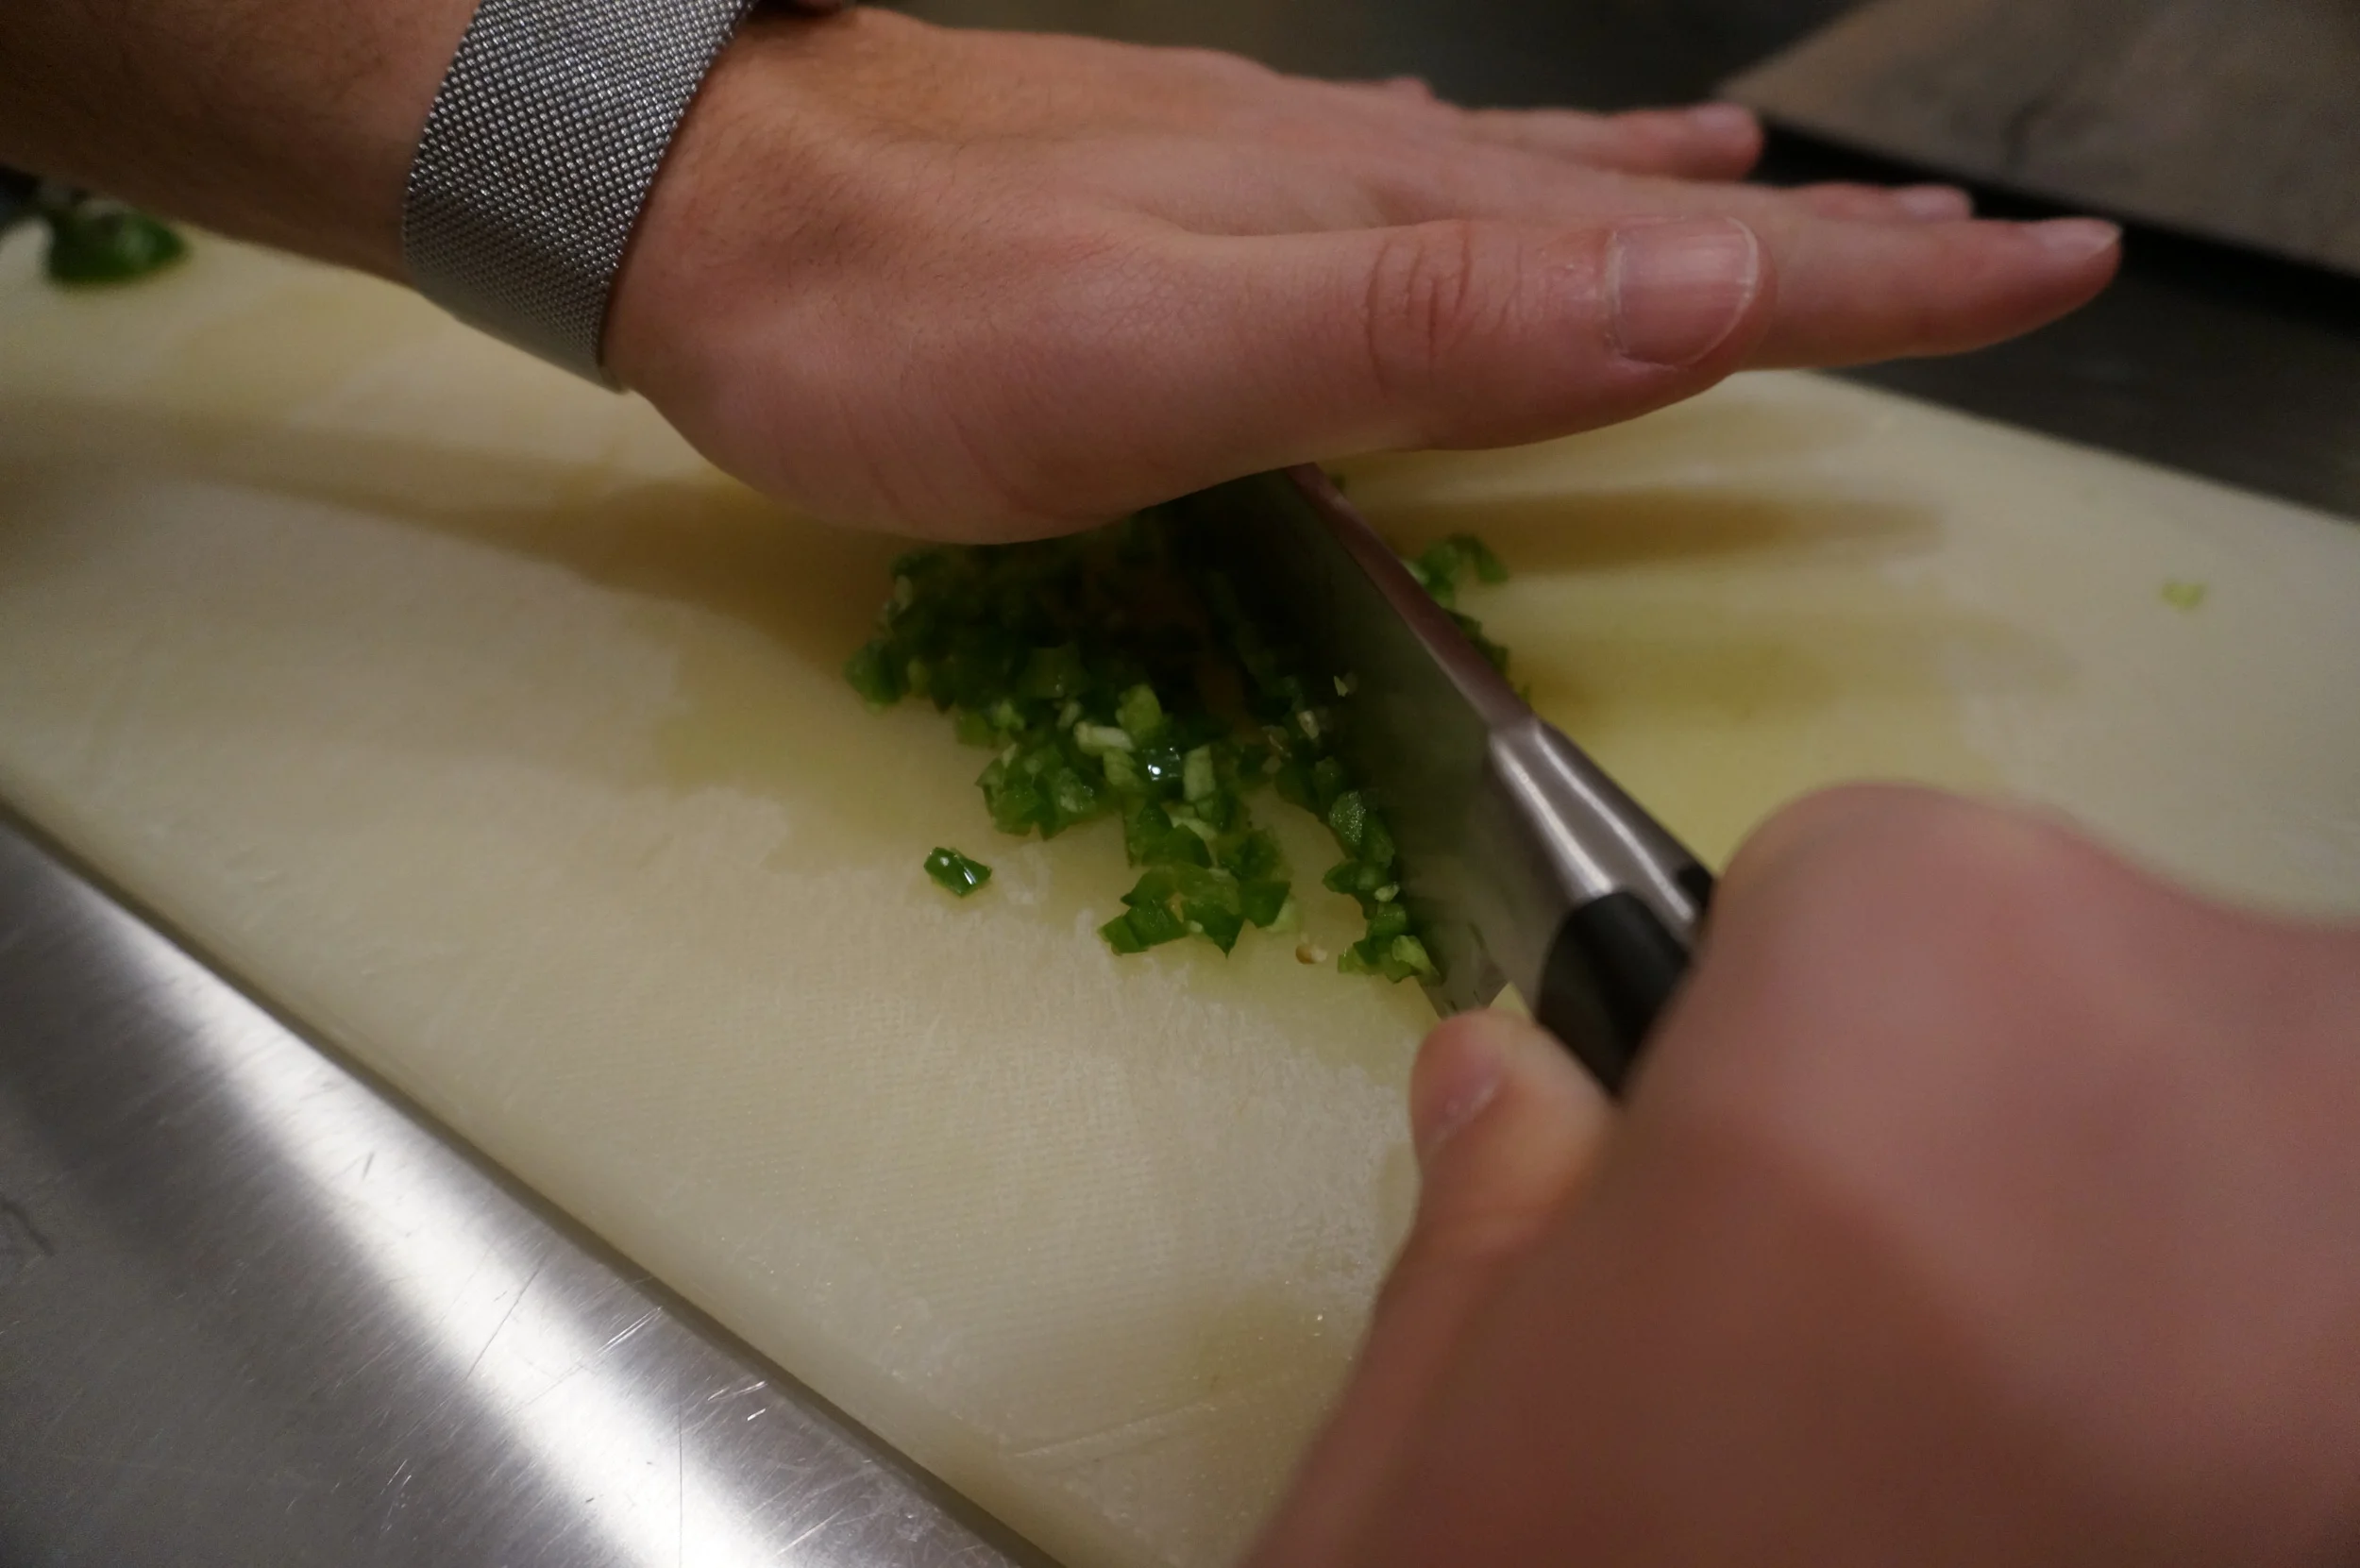
While the salsa is cooking you can wash your cilantro and chop off the bottom stems. Since you are putting this in the blender, there is no need to remove every leaf from the stem. Just chop off the long ends.


After 10 minutes remove the vegetables with a strainer and place in the blender. I would put only 1 jalapeño in the blender to start, put the other jalapeños aside and add after you have tasted the blended salsa.


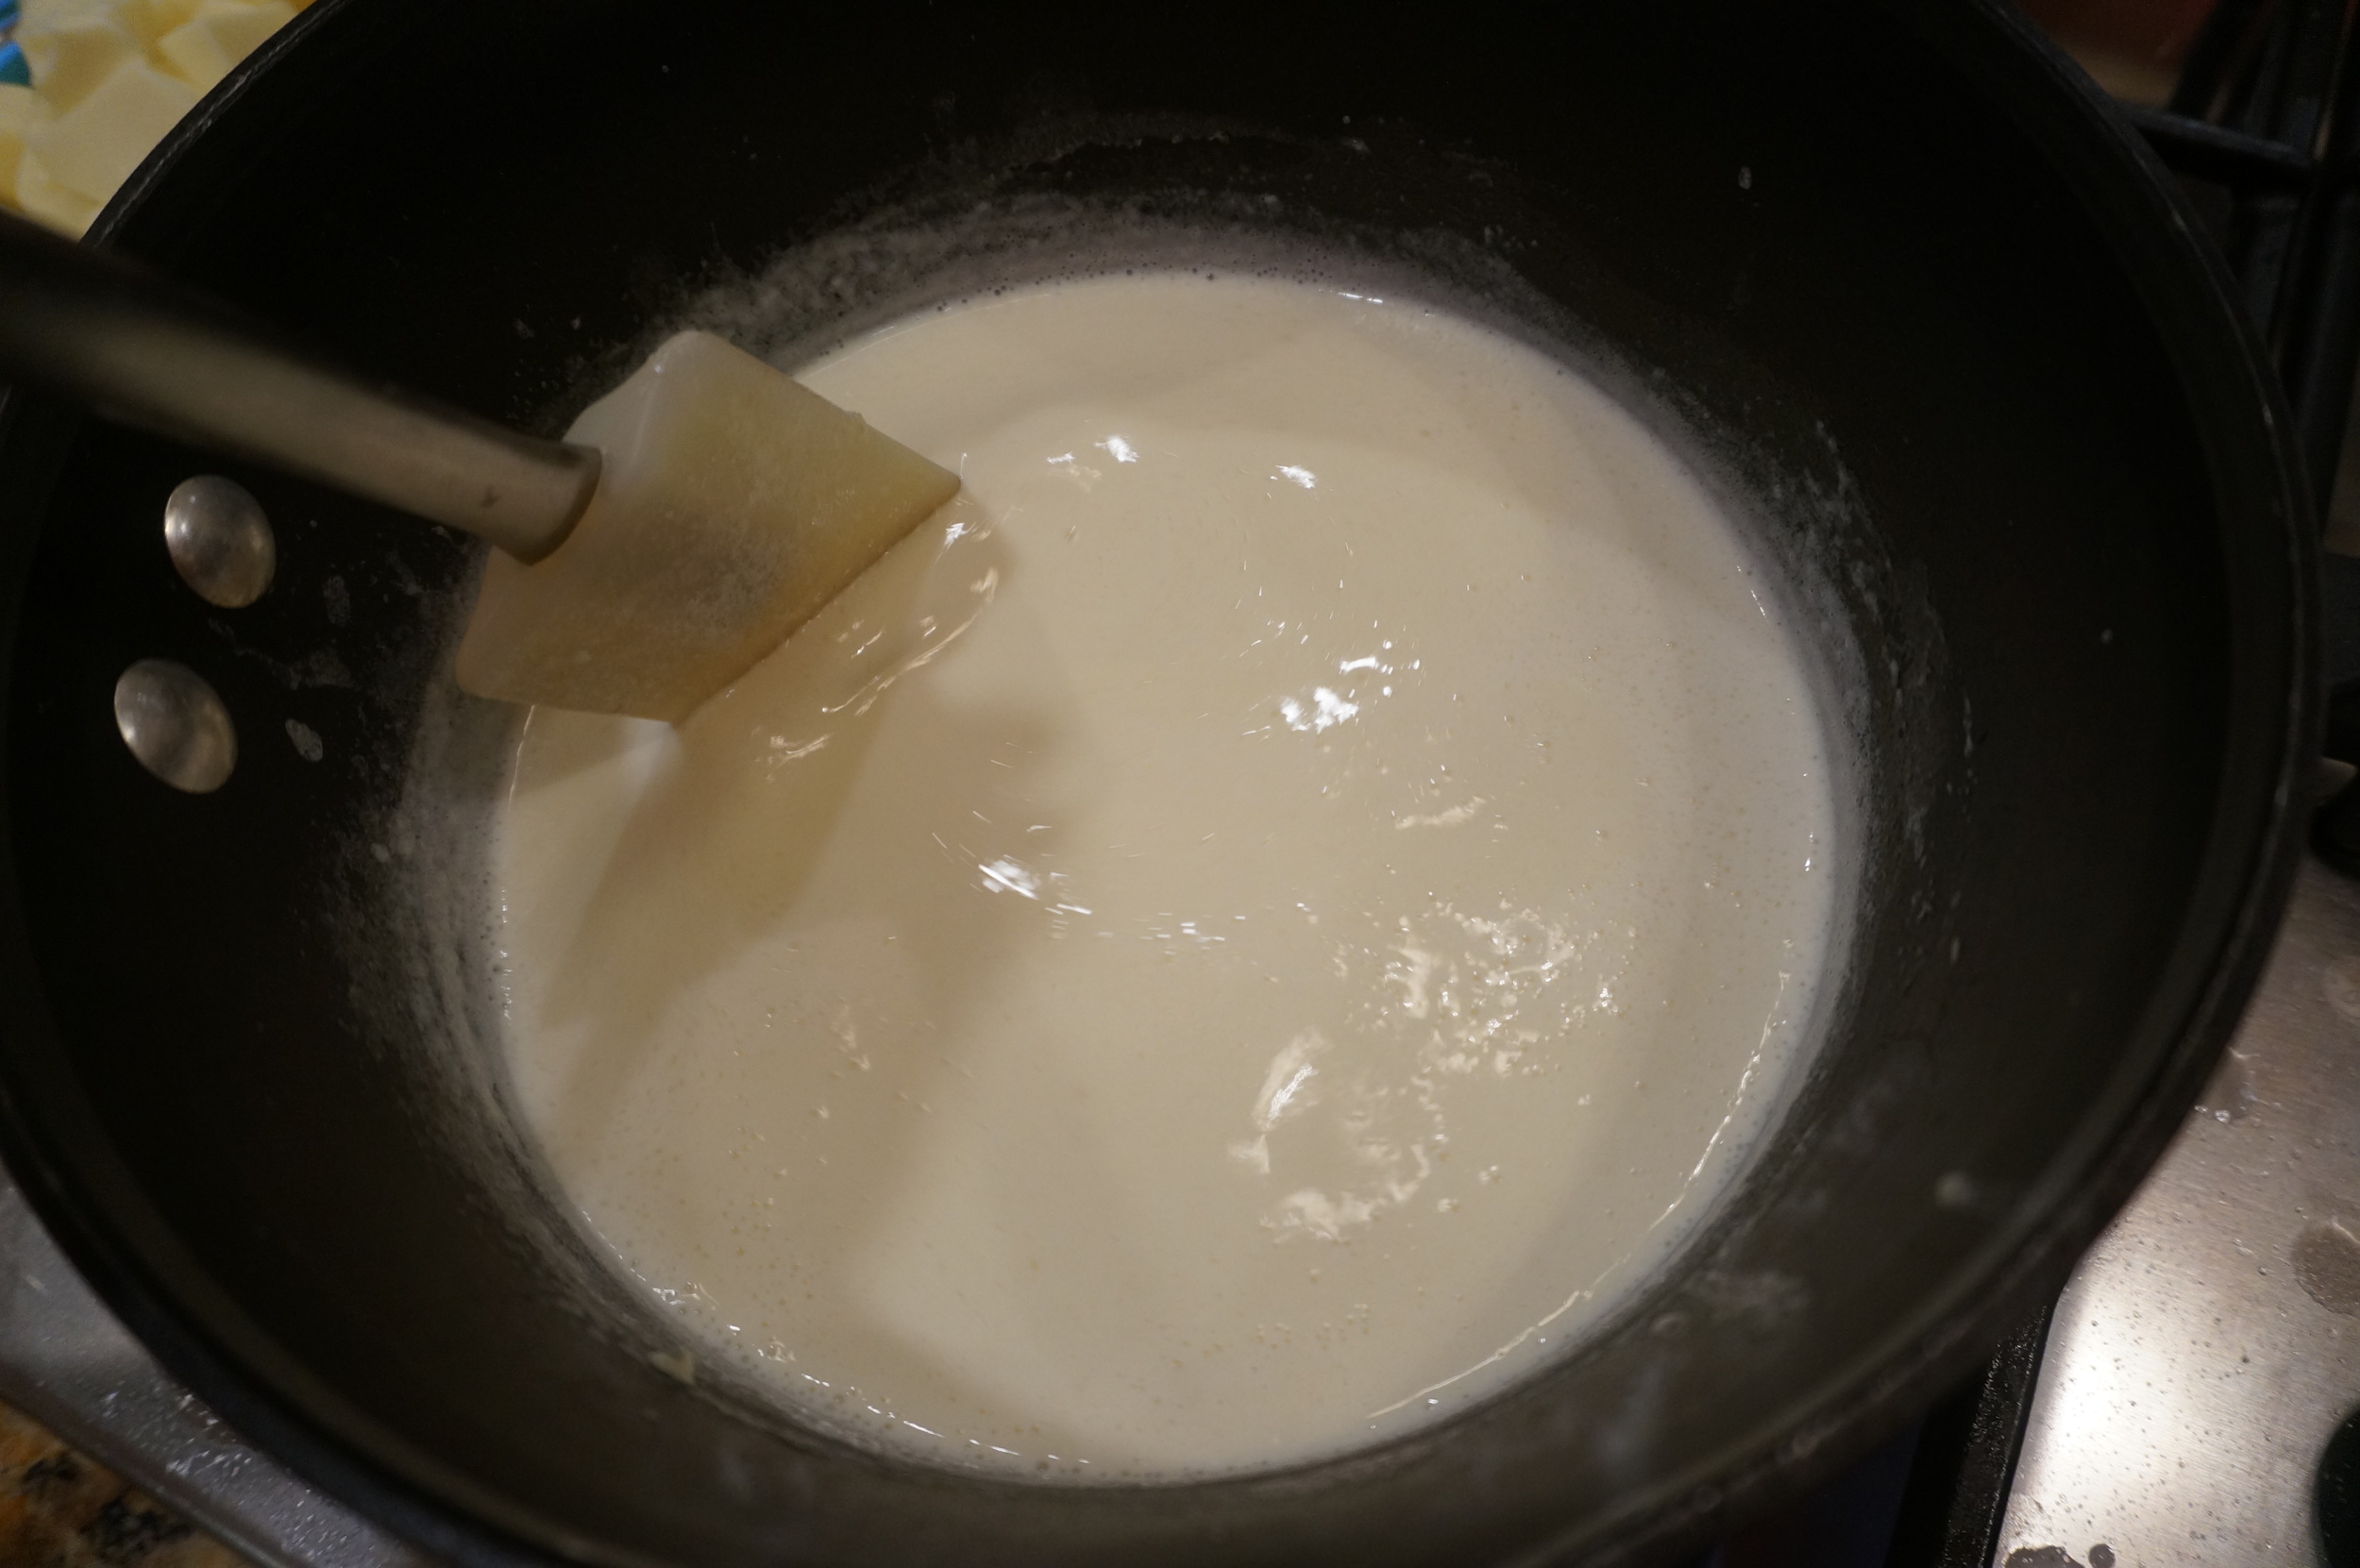
Be careful mixing hot liquids in the blender. It can be a explosive and dangerous situation if you do not either cool the mixture down first, or remove the small plastic lid while blending to allow the steam to escape.  Put your cooked vegetables in blender, add your salt, and blend 'till smooth.  Taste the mixture and add jalapeños to taste. Once blended, you can then slowly drizzle the oil in while the blender is on low. Once the oil is added, add your cilantro and blend on high 'till smooth and creamy. If you are making the creamier version, you would add your sour cream and avocado when you add your cilantro.


This is the creamier version green sauce. Make some chili con queso and a margarita, and you can have a party!


TOMATILLO SALSA RECIPE


Serves 10 people (or 2 people for 1 week )
Prep Time: 10 minutes

Cook Time: 10 Minutes

ingredients

  • One pound tomatillos (about 5-6 medium sized tomatillos)
  • 1 to 4 jalapeños (depending on your heat tolerance)
  • 1/4 of a onion, peeled
  • 2 cloves garlic
  • 1 teaspoon salt
  • 1/8 cup olive oil (halfway fill up a 1/4 measuring cup)
  • Handful of cilantro, long stems chopped off

optional additions

(for a creamier salsa)

  • One avocado
  • 1/2 cup sour cream

PREPARATION

  1. Peel off the skins of the tomatillos and wash the tomatillos.
  2. Break off the stems of the jalapeños and wash the jalapeños.
  3. Cut your onion into a quarter and peel.
  4. Add the tomatillos, jalapeños, onion, and 2 cloves garlic to a medium saucepan and add enough water to cover the mixture.
  5. Put on high heat and let it come to a boil.
  6. Once boiling, reduce heat to medium high and simmer for 10 minutes.
  7. Wash your cilantro, cut off the long stems only, dry on paper towels and set aside.
  8. Strain the mixture and place in the blender. I would recommend starting off with one jalapeño, place the other 3 jalapeños on the side. After blending you can keep the adding the jalapeños as your taste allows.
  9. Add your salt.
  10. Either let your mixture cool down a little, or you can blend on high if you have a lid that you can semi close to let the steam escape. A hot mixture in a blender can create a explosion if you do not allow the steam to escape while blending.
  11. Taste your mixture for hotness. Add more jalapeños per your taste and blend again till smooth.
  12. Once the mixture is blended, remove your lid, and with the blender on a low speed, slowly stream in your oil. Add your cilantro and blend on high till smooth and creamy.
  13. For the creamier salsa, you can add your sour cream and avocado to the mixture when you add your cilantro.

Note: The salsa will last a week in the fridge. The creamier version will last 2-3 days.


PRINT RECIPE


In Appetizer, Mexican

CHILI CON QUESO

December 4, 2015 Julie Sanchez

Chili con queso...it is a staple here in Texas.  I developed this recipe 30 years ago, inspired by a beer cheese soup I had in Clearwater Florida. The combination of the beer and cheese and the silky, creamy texture was amazing. The basis of this queso is a roux, which keeps it creamy, and the beer gives the queso a rich depth of flavor.  I never liked the quick method of making the quick, easy queso...microwaving processed cheese and stirring in rotel, since the cheese gets hard quickly and does not stay creamy.  I apologize now, there is absolutely nothing healthy or low fat about this recipe. This is part of my 80/20 rule...we can not be good 100% of the time.


Velveeta cheese was my go to yellow processed cheese for years until HEB came out with their Queso Blanco (white cheese) processed cheese. You do not need both processed cheeses, you only need one. If you can find the HEB brand go for it. It makes a white queso that's a little less salty. If you can not find it, or prefer a more traditional yellow queso than use the Velveeta. I also like to add a monterey jack cheese to the mixture...so you can say there is "some" real cheese in your queso.


I like to add fresh jalapeno to the mixture to give it some kick. If you live in Texas, you do not need to remove the seeds and membrane (that is the hottest part of the pepper), you can take the heat. If you live outside Texas you probably will need to remove the seeds. Cut the jalapeno in half, then strips, then dice finely. Try to wear gloves, if you wear contacts be careful, as the heat will stay on your hands even after you wash your hands. 


To cut the jalapeno into the finest dice, put one hand on the top of your knife, keeping the knife edge on the cutting board while using your right hand to raise and lower the handle. This gives you control of the knife and achieves the smallest dice.


If you are using the HEB queso blanco, cut the 32oz block in half, you only need 16 ounces. Of course if you are having a large party, double the recipe and use the whole block.


Do all your prep work before you begin to cook the queso. The whole cooking process is fast, so have everything ready to go before you start cooking. Cut your processed cheese into cubes, grate your monterrey jack cheese, dice jalapenos, and combine your liquid ingredients (half & half and beer)


Once you have all your prep work done, melt your butter in medium saucepan on medium heat. Once it melts, stir in the flour till smooth and let simmer 1 minute. You need to actually cook the flour. You can see above how it looks during that one minute. 


After cooking the flour and butter mixture one minute, pour in the liquid ingredients, and stir to combine. Keep stirring occasionally for about three minutes till it begins to thicken. Do not walk away from the stove at this point. This all happens quickly. Once this step is complete you have officially made a roux. (A roux is used to thicken sauces and soups).


Once the mixture has become thicker, you can test it by seeing if it coats your spoon, like photo above. The longer you cook it, the thicker it will become. It really takes one time to make it to figure out the consistency you like. If it is too thick, once you add the cheese, to your taste, then you probably let it cook too long at this point. It is not a big deal, since you can always add milk at the end if you want a thinner consistency.


Once the mixture coats the spoon, turn the heat down to low and add your cheeses and jalapenos. Stir occasionally till melted and creamy. Now all you need are some chips!


We love to drizzle queso on our scrambled eggs, on breakfast tacos, and on poached eggs with english muffins (in place of hollandaise).


CHILI CON QUESO RECIPE


Serves 8-10 people as an appetizer

Prep Time: 15 minutes

Cook Time: 10 minutes

INGREDIENTS

  • 16 ounces processed cheese, cubed
  • 4 ounces monterey jack cheese, grated
  • 1 jalapeno, finely diced, remove seeds for less heat
  • 1  1/2 cups half & half (can use milk, but will not be as creamy)
  • 1/2 cup beer
  • 4 tablespoons butter
  • 3 tablespoons flour

PREPARATION

  1. Finely dice your jalapeno and set aside.
  2. Grate your monterey jack cheese, and cube your processed cheese.
  3. Combine your beer and half & half.
  4. Start drinking the remaining beer, hate to waste a beer.
  5. Melt the butter in a medium saucepan on medium heat.
  6. Add the flour, stir to combine and let simmer for one minute.
  7. Pour in the liquid mixture, stir to combine, keep stirring till slightly thickened and coats your spoon...about 3 minutes. Do not walk away from the stove at this point. It all happens so fast.
  8. Once thickened, reduce you heat and add your 2 cheeses and jalapenos. Occasionally stir till cheese is melted.

PRINT RECIPE


In Appetizer, Mexican
← Newer Posts