• Home
  • Categories
  • Contact
  • Subscribe
  • About
Menu

Julie's Taste

Street Address
City, State, Zip
Phone Number

Your Custom Text Here

Julie's Taste

  • Home
  • Categories
  • Contact
  • Subscribe
  • About

BUTTERNUT SQUASH SOUP WITH CASHEW CREAM

October 25, 2018 Julie Sanchez
DSC04495.jpg

Since Halloween and Thanksgiving are coming up, I thought this would be the perfect time of year to serve this creamy, satisfying, and easy soup. When I was developing the recipe, I made the soup so many different ways. I tested the soup with onions, versus shallots, versus leeks, and all the soups tasted the same. I also tested the soup with half and half versus cashew cream. My husband and I did blind taste tests to confirm which creamy soup we preferred, and we both agreed the cashew cream soup was tastiest. If you are not familiar with cashew cream, do not be scared. It is easy to make and it really has no taste; it simply thickens and enrichens the soup. I think in my old age, my tummy is becoming sensitive to dairy products. So this is the ideal soup if you watching your diet or simply cutting out dairy.


Make sure you buy unroasted and unsalted cashews. This is very important for the cashew cream. I prefer the organic low sodium vegetable broth, and I love the precut butternut squash from Trader Joe’s. Cutting up a butternut squash is simply not fun!


DSC04441.jpg

My son loves a pinch nutmeg in the soup, I prefer cayenne pepper over the nutmeg. But either one works, depending on your taste. I like to garnish the soup with a sprinkling of roasted pepitas. I buy them at HEB in the produce isle. We are addicted to pepitas. We pull them out to munch on when we are having a drink. So if you buy them they will not go to waste.


DSC04443.jpg

You must soak the cashews a minimum of 4 hours to overnight at room temperature. I usually soak them in the morning before I make the soup in the afternoon, or you can soak them overnight. Just the cover the cashews with water.


DSC04448.jpg

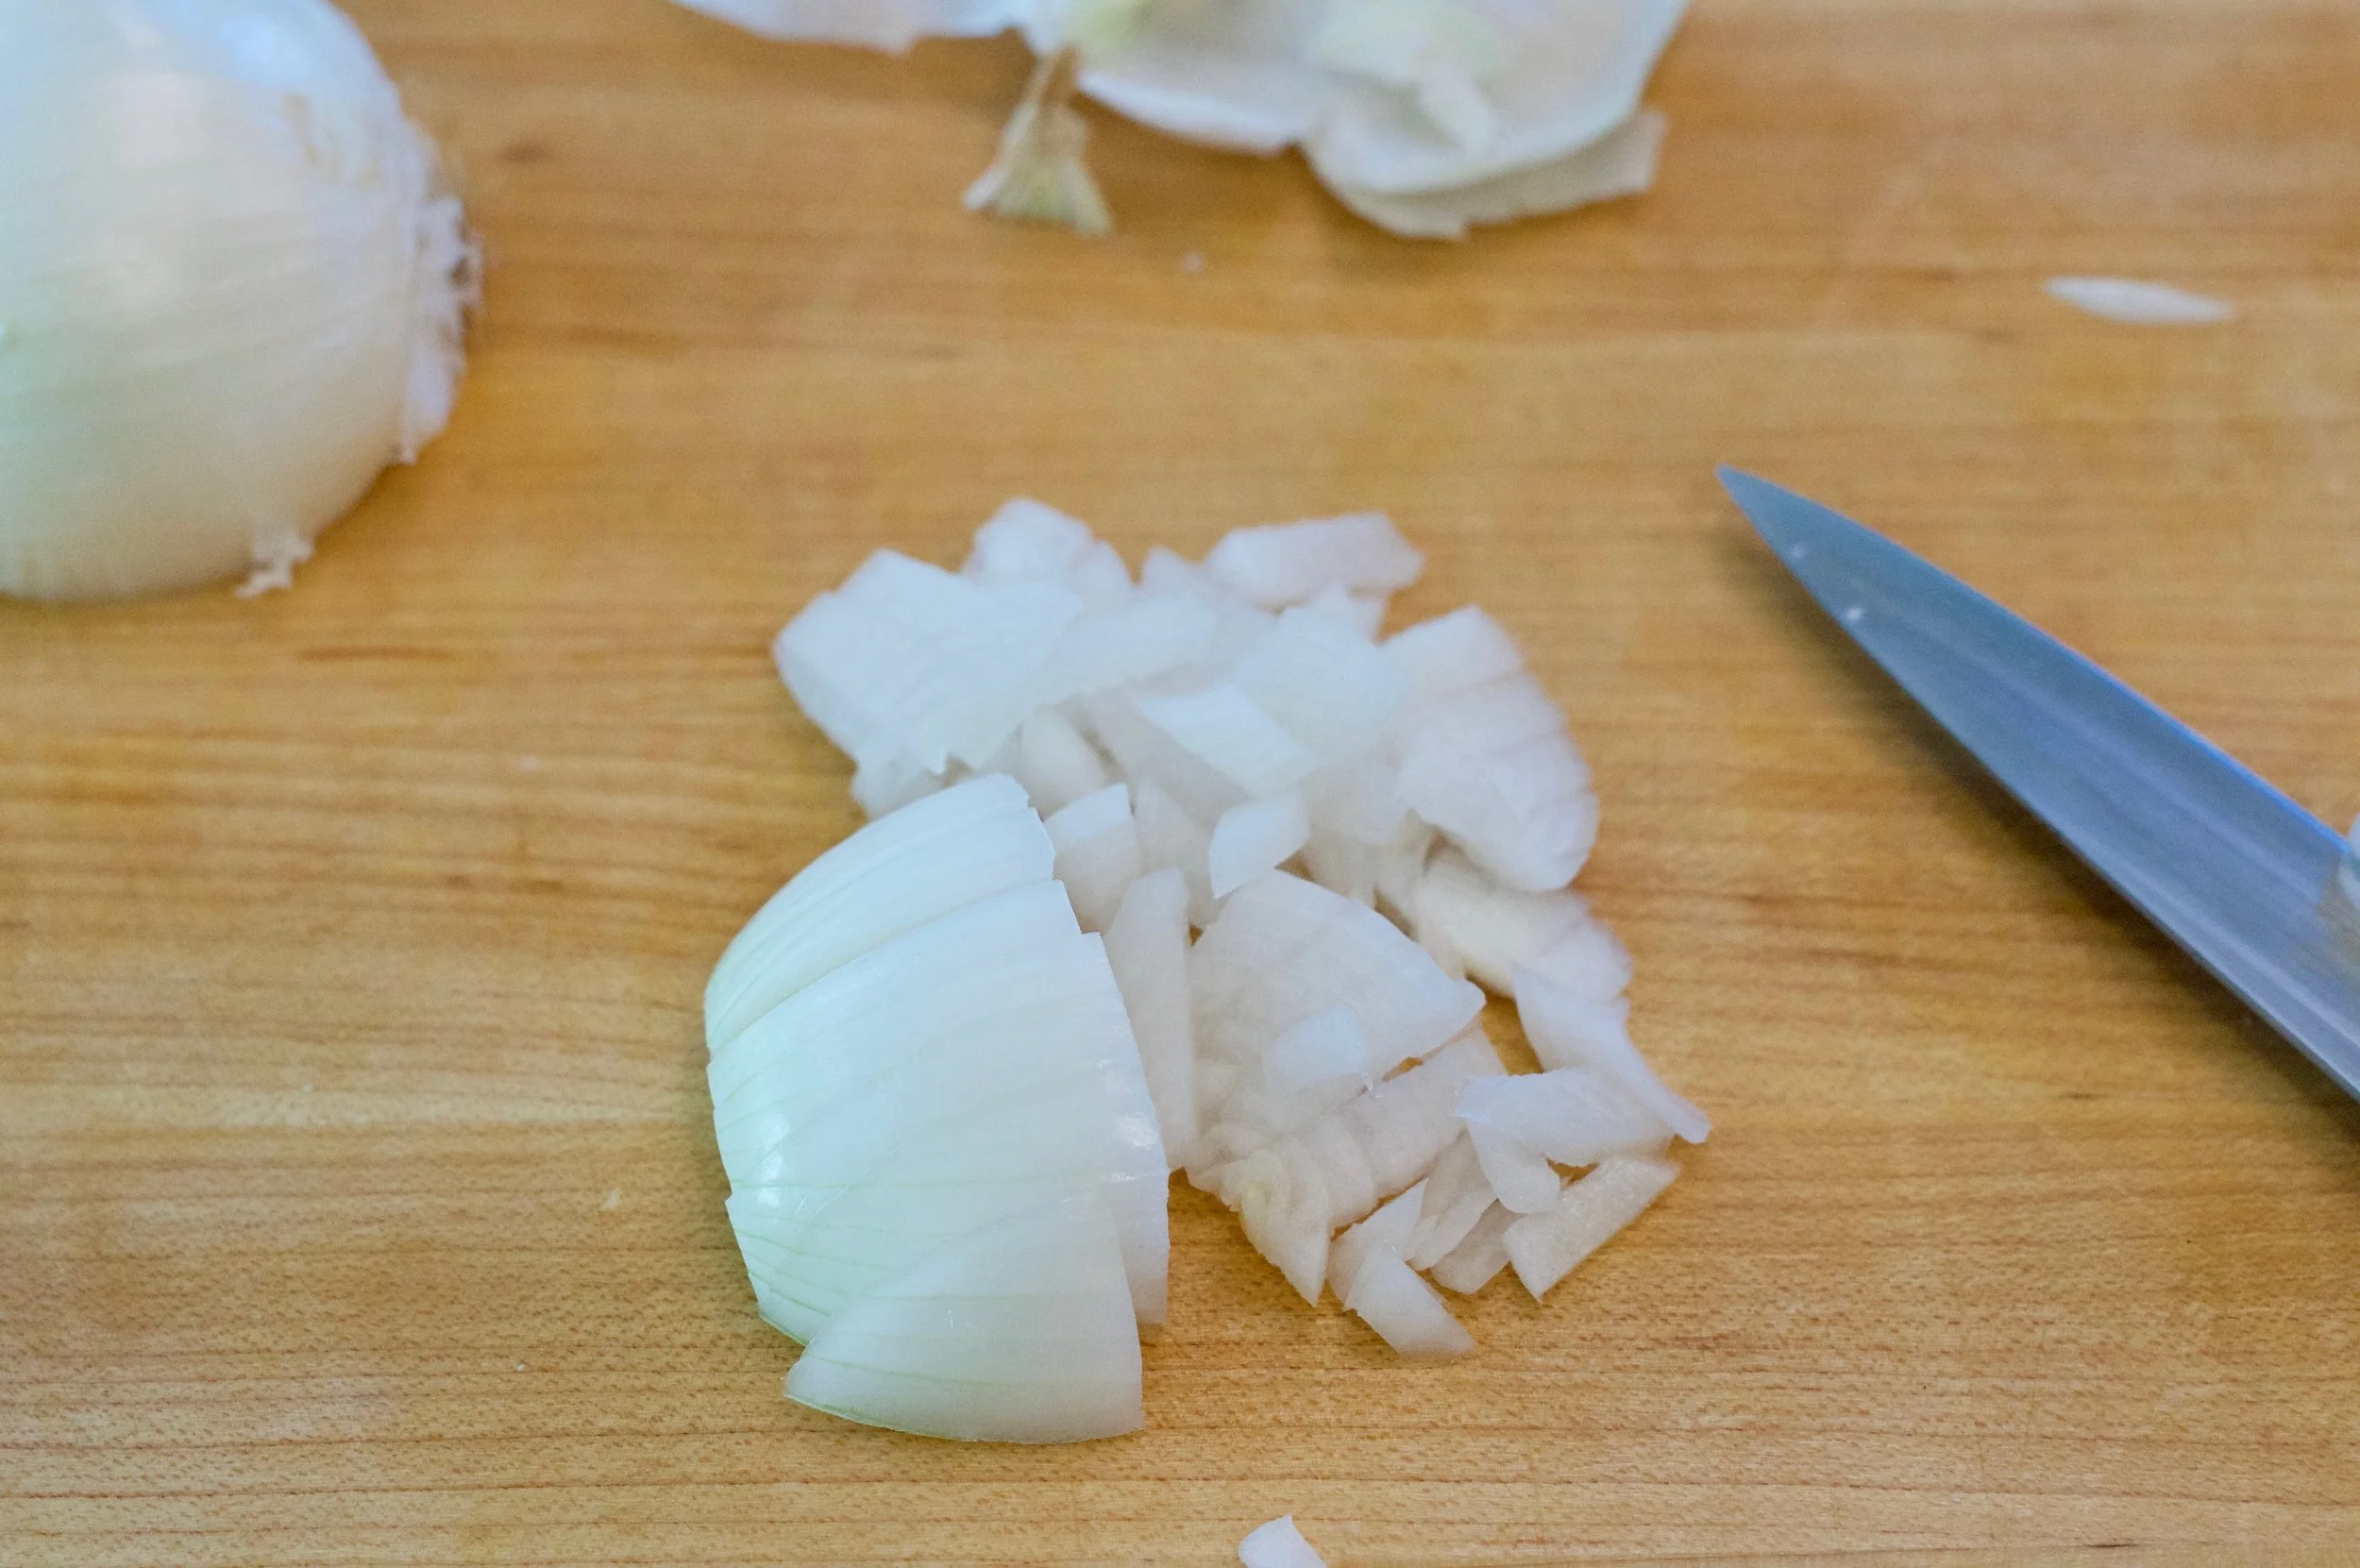
Peel the onion, slice off the ends and roughly chop the onion.


DSC04460.jpg

Peel the garlic and roughly chop the garlic.


DSC04456.jpg

On high heat in a medium saucepan saute the onions with 1 tablespoon olive oil for 4-5 minutes till golden.


DSC04463.jpg

Add 4 1/2 cups of broth, the butternut squash, garlic, and black pepper to the onion mixture and bring to a boil. Once boiling, cover, turn heat to medium and simmer for 20 minutes.


DSC04444.jpg

While the soup is cooking you can prepare the cashew cream. You must rinse the cashews and drain before adding to the blender or Nutribullet. Rinsing the cashews makes the cashew cream easier to digest.


DSC04481.jpg

You need a powerful blender or a Nutribullet to make the cashew cream. If your blender is not powerful you will not achieve the smooth consistency you need. I like to use a Nutribullet because its powerful and quick. You simply combine 3/4 cup of vegetable broth with the rinsed cashews and blend till really smooth and creamy. Alternatively you can add the cashews to your blender with your 3/4 cup of broth, start on a slow speed and build up to the highest speed for 1 minute. Check to see if you have a smooth texture. It is easier in the blender since you can add your soup to the cashew cream and blend all together. The Nutribullet does make the cashew cream smoother than a traditional blender.


DSC04483.jpg

Once the soup has cooled, spoon it in the blender and add your salt. Blend till smooth. Since my cashew cream was made in my Nutribullet I blend the soup first and then add the cashew cream. If you make the cashew cream in the blender first, you will just add the soup to the cashew cream and blend all together. Make sure to open the top of the blender a little to allow steam to escape to prevent an explosion.


DSC04485.jpg

Add the cashew cream and blend again till smooth and creamy. Taste the mixture for consistency. If you prefer a thinner soup then add more broth and blend again. At this point you can add a pinch of nutmeg or cayenne pepper and blend once more to combine.


DSC04489.jpg

Your soup is ready to reheat for serving or storing for later.


DSC04498.jpg

The soup fits perfectly in these containers I bought from HEB. They have screw tops so they are awesome for transport, and they stack which is a bonus.


BUTTERNUT SQUASH SOUP WITH CASHEW CREAM RECIPE


Serves: 4-6 people
Prep Time: 10 minutes
Cook Time: 20 minutes

INGREDIENTS

  • 1 cup raw and unroasted cashews, soaked minimum 4 hours in water, drained and rinsed

  • 1 onion, roughly chopped

  • 1 tablespoon olive oil

  • Two 12 ounce packages precut butternut squash from Trader Joe’s

  • 5 1/4 cups (44 ounces) vegetable broth, divided (3/4 cup and

    4 1/2 cups)

  • 2 cloves garlic, roughly chopped

  • generous grinding of black pepper

  • 2 teaspoons salt

OPTIONAL INGREDIENTS

  • Pinch of nutmeg or cayenne

  • garnish with roasted pepitas

EQUIPMENT NEEDED

  • powerful blender or

  • Nutribullet

PREPARATION

  1. Soak cashews in a small bowl, cover with water and soak a minimum of 4 hours or overnight.

  2. Roughly cut up one onion and place in a medium pan. Turn heat on high and add 1 tablespoon olive oil.

  3. Saute for 4-5 minutes, stirring occasionally till golden.

  4. Add 4 1/2 cups of the broth carefully to the pan (it will sizzle due to high heat) along with the butternut squash, the garlic and black pepper.

  5. Bring to a boil, cover and reduce heat to medium. Simmer for 20 minutes.

  6. While the soup is cooking, make the cashew cream by first draining and rinsing the cashews. Place them in a blender or Nutribullet. Add 3/4 cup of the remaining vegetable broth. Blend till very smooth and creamy. If using a blender, start the mixture on low and build up to the highest speed for 1 minute still smooth.

  7. Once soup has cooked, let it cool down a little before blending.

  8. If you made your cream in the blender, simply add the soup and blend till smooth. Allow steam to escape from the top so no explosion will occur. If you used the Nutribullet, blend your soup first and then add the cashew cream.

  9. Sample to make sure you like the consistency, and add more broth if necessary. You can add a pinch of cayenne pepper or nutmeg if you desire, and blend once more.


Print Recipe


In Soup, Paleo, Main Course, Vegetarian

CUCUMBER MARTINIS

July 18, 2018 Julie Sanchez
DSC04393.jpg

I had my first cucumber martini in Newport Beach. It was love at first sip. I have tried to replicate it for years and have finally achieved a cucumber martini that is both refreshing, slightly tart, and perfect for a hot summer evening. A true classic martini is too strong for me, so my version contains 2 shots of alcohol per glass, which is not weak, but this way you can have 2 martinis which is exactly what we like to do.


DSC04331.jpg

We always prefer tequila over vodka, but either one is perfect for this recipe. You also need tajin, which is a common Mexican condiment made of chile peppers, lime powder, and salt. My hubby sprinkles it on jicama and cucumber, and it is used the rim the glasses of micheladas and bloody mary's. Its both tart and salty but not really spicy.  Tajin really makes this drink special, so do not skip this step. I use a hothouse or what they call seedless cucumber (it always comes wrapped in plastic). 


DSC04338.jpg

 Cut the ends off the cucumber and peel the cucumber.


Cut the cucumber into chunks and place it in a blender with 1 cup of water.


DSC04348.jpg

Blend till totally smooth.


DSC04354.jpg

Strain the mixture into a container that can hold 3 cups. Do not stir or force the cucumber mixture in the sieve. Let it drip on its own for about 5 minutes into a container. If you force the mixture and press it into the sieve you will get pulp into your drink, you only want the liquid not the pulp. Discard the pulp left in the sieve.


DSC04358.jpg

Slice and squeeze enough lime juice in a separate glass to measure 1/3 cup. Save a lime half to wet the martini glass rim later.


DSC04360.jpg

Add 1 cup of tequila or vodka ( but not both ) to your cucumber liquid mixture.


DSC04367.jpg

Add 1 tablespoon agave to the mixture and stir till combined. Then taste for sweetness. We do not like things sweet, so you need to sample for your own taste, and add more if you prefer.


DSC04361.jpg

Get a flat plate and sprinkle tajin around in a circle. Rub your glass with the leftover lime half over the rim and dip the rim in the tajin. You can place your glasses in the freezer at this point if you choose.


DSC04405.jpg

You can find tajin at HEB in the produce isle, next to the guacamole, chips, and fresh juices. I prefer the low sodium tajin.


DSC04370.jpg

If you are having guests you can transfer the mixture into a nice container. Pour half the mixture (which makes 2 martinis) into a shaker, add 4 ice cubes, and shake for 30 seconds. Pour, relax, and enjoy!


CUCUMBER MARTINI RECIPE


Serves: makes 4 martinis (which means 2 people in my opinion)
Prep Time: 10 minutes

INGREDIENTS

  • one hothouse cucumber, peeled and chopped roughly
  • 1 cup water
  • 1/3 cup lime juice, 2-3 limes
  • 1 cup tequila or vodka
  • 1 tablespoon agave, or more to taste
  • tajin salt

PREPARATION

  1. Cut the ends off the cucumber and peel. Cut into rough chunks and throw into the blender with 1 cup of water.
  2. Blend till smooth and pour into a strainer that is large enough to hold 3 cups of liquid. Set aside and let the liquid drip out, about 5 minutes. Do not try to push the mixture through the strainer or stir the mixture, because you will get little pieces of cucumber, and all you want is the juice. After 5 minutes discard the cucumber guts in the strainer.
  3. Cut your limes and juice the limes. Save one lime half to wet the martini glasses later. Add the limes juice to the cucumber juice.
  4. Measure 1 cup of tequila or vodka into the cucumber liquid.
  5. Measure 1 tablespoon agave and add to the cucumber liquid, and stir to combine thoroughly. Taste for sweetness, add more agave if you like it sweeter.
  6. Sprinkle the tajin salt in a circle on a flat plate. Use the lime half to wet the rim of the glass. Dip the glass into the tajin salt. At this point you can freeze the glasses if you prefer.
  7. When ready to serve pour half the mixture into a shaker with a few cubes of ice and shake for at least 30 seconds to allow the mixture to cool. Pour into 2 glasses and enjoy. Repeat and enjoy some more.

PRINT RECIPE


In Cocktails

ROBERTO'S MIGAS

July 4, 2018 Julie Sanchez
DSC04318 (1).jpg

On the weekends, we love to wake up late and prepare a substantial breakfast. Crisp tortillas with onions and cheese... topped with runny eggs, it doesn't get much better than that. Traditional migas are made with scrambled eggs, which we still make if we are serving a crowd, but my husband Roberto invented this version, which I find keeps the tortillas more crunchy, and the runny yolk creates a sauce which I love.


DSC04265.jpg

I prefer nitrate free bacon and ham. You also need corn tortillas, eggs, avocado, jalapeno, onion, and Monterey jack cheese.


DSC04276.jpg

Chop the jalapeno finely. If you can not take the heat, use only half the jalapeno or you can remove the spicy seeds before you chop it. We chop up the entire jalapeno; we are professionals in taking the heat! Add the jalapeno to a small bowl.


DSC04278.jpg

Cut the onion in half; save the other half for another use. Peel the onion, cut it down lengthways, and then finely chop the onion. Add to the jalapeno mixture in a small bowl.


DSC04288.jpg

Stack the corn tortillas and cut one direction, then the other to create cubes. Set aside in a small bowl.


DSC04267.jpg

If you stack the ham, it tends to stick together even when you saute it. Cut the ham into cubes. Place in a small bowl.


DSC04269.jpg

You can stack the bacon, since it will break up with you fry it. Place in a small bowl.


DSC04292.jpg

Your prep work is complete.


DSC04294.jpg

In a small skillet, add 1/4 cup of olive oil. Turn on to medium heat and add the bacon. Fry gently till the bacon lardons have browned. Stirring occaisonally.


DSC04295.jpg

Remove the bacon with a slotted spoon on to paper towels to drain. Add the tortillas to the oil mixture.


DSC04296.jpg

Saute the tortillas till lightly brown and crispy. It will take about 3-4 minutes, stirring often. Remove with a slotted spoon to paper towels to drain. Pour almost all the oil into a small bowl to discard later.


DSC04299.jpg

Add the onions and jalapenos with the little bit of oil remaining in the pan. Saute till the onions have softened.


DSC04302.jpg

Add the ham, and stir till the ham as heated through. Turn off the heat and set the pan aside.


I use a grill pan to fry my eggs, I cook them on medium heat, flip them and try to keep the yolk runny. Traditionally you scramble eggs for migas, and if I have a large crowd of people I do scramble the eggs. We just prefer the soft yolks running all into the tortilla mixture.


Combine the tortillas and bacon into the pan with the sauteed onions and stir to combine. Place on to plates. Sprinkle with the cheese, and place 2 eggs on each plate. Top with avocado and tomatillo sauce or red sauce (both recipes are on this blog).


DSC04314.jpg

If you want push the easy button, you can purchase Taco Deli's Salsa Dona from Whole Foods in the refrigerated section of the produce isle. I buy it weekly and put it in a squirt bottle. If you are from Austin, you know how good this basically just jalapeno and garlic sauce is. Very hot and very good!


DSC04320.jpg

I had to add more one photo, its just so beautiful to me.


DSC04328.jpg

Enjoy!


ROBERTO'S MIGAS RECIPE


Serves: 2 people
Prep Time: 15 minutes
Cooking Time: 15 minutes


INGREDIENTS

  • 1 jalapeno, diced finely (remove seeds if you're not a Texan)
  • 1/2 medium onion, finely chopped
  • 4 corn tortillas, cut into cubes
  • 2 slices of ham, chopped
  • 3 sliced of bacon, cut into lardons
  • 1/4 cup olive oil
  • 4 eggs
  • 1/4 cup Monterey jack cheese, grated
  • sliced avocado

preparation

  1. Dice the jalapeno finely. If you are concerned about the heat, remove the seeds or use only half the jalapeno. Add to a small bowl.
  2. Cut the onion in half, save the other half for another use.  Peel and finely dice the onion. Add to the jalapeno mixture.
  3. Slice the ham into cubes. Place in a small bowl.
  4. Stack the bacon and cut into thin slices (lardons). Place in a small bowl.
  5. In a small saute or omelet pan add 1/4 cup oil and turn burner to medium heat. Add the bacon and saute till lightly browned and crispy. Stirring occasionally. Once cooked, remove with a slotted spoon and place on paper towels to drain.
  6. Add the tortillas to the oil mixture, stir occasionally. It should take 3-4 minutes for the tortillas to become crispy and slightly golden. Remove with a slotted spoon onto paper towels to drain.
  7. Drain almost all the oil from the pan into a small bowl to discard later. Save about 2 teaspoons of oil in the pan.
  8. Place the pan back on the medium heat and saute the onions and jalapenos till the onions have softened.
  9. Add the ham and stir till heated through. Turn off heat and set aside.
  10. Use a griddle pan or large saute pan to fry your eggs. Turn on medium/medium high heat. Wait for the pan to become hot, sprinkle in a little olive oil and fry the eggs. Flip the eggs and remove before the yolk becomes hard.
  11. Add the tortillas and bacon to the onion mixture, stir to combine and place equal amounts on each plate.
  12. Top with the grated cheese and 2 eggs. Garnish with avocado slices.

Note: Migas are also great served with my refried black beans. (Recipe is here) 

Note: If you prefer scrambled eggs, simply scramble your eggs, then add the tortilla mixture and cheese to your eggs, stir to combine and serve.


PRINT RECIPE


In Breakfast, Mexican

SHRIMP SALAD WITH LEMON AND DILL

July 1, 2018 Julie Sanchez
DSC04199.jpg

Shrimp salad with lemon and dill is so refreshing and perfect for hot summer days. I love that you can make this salad in advance and just pull it out of the fridge and place it on an avocado half or a bed of arugula and you have a beautiful delicious meal. This is one of our go to meals on Friday nights, when we play golf till 7:30, make a grapefruit martini, pull dinner out of the fridge, and begin to enjoy the weekend.


DSC04216.jpg

I prefer to buy larger shrimp, about 16-20 shrimp in a pound, since peeling and cleaning them can be time consuming. I also like to buy wild caught, not farm raised shrimp.  Primal Kitchen's avocado mayo is my new go to mayo. You also need fresh dill; dried dill will not pack the same punch in this recipe.


DSC04231.jpg

You need a microplane for zesting in this recipe. You can also use the microplane for Parmesan shavings in other recipes, so it is worth investing in one.


DSC04226 (1).jpg

Measure out 2/3 cup of mayo in a large rimmed bowl since zesting can be messy. Zest your 2 lemons, turning the lemon as you zest to make sure you do not get the bitter white pith in your zest. 


DSC04235.jpg

Cut your lemons in half and squeeze the juice into a small bowl. Measure 2 tablespoons lemon juice into the mayo mixture. Put the remaining juice and lemon halves into a large pot that you will boil the shrimp in. Fill the pot half up with water and bring to a boil.


DSC04237.jpg

Pick the dill off the larger branches.


DSC04238.jpg

Chop the dill finely, add 3 tablespoons to the mayo mixture.


DSC04239 (1).jpg

Add 1/4 teaspoon salt, and freshly ground pepper to the mayo mixture and stir till smooth.


DSC04242.jpg

Prepare a ice bath for your shrimp with a large bowl filled with ice and cold tap water. Once your water is boiling add your shrimp. Set your timer or stopwatch on your phone for 4 minutes. Keep fire on high. The boiling should resume, but even if it does not, you can tell when the shrimp are done when 1 or 2 shrimp float to the top of the water. So do not overcrowd the shrimp in a small pot; use a large pot. Remove your cooked shrimp with a slotted spoon and place in the ice bath.


DSC04243.jpg

The ice bath keeps the shrimp from overcooking and they're easier to peel when they are cool.


DSC04247.jpg

Drain the shrimp and then peel them.


DSC04249.jpg

Cut down the top of each shrimp to clean the yucky brown poo from the shrimp. You may have to run the shrimp under water to clean it well.


DSC04250.jpg

Once cleaned, place the shrimp in paper towels and dry thoroughly so the mayo mixture can adhere to the shrimp.


DSC04254.jpg

Cut the shrimp into small pieces and add to a medium sized bowl.


DSC04255.jpg

Slice the celery straight across the grain as thinly as possible.


DSC04261.jpg

Add the celery to the shrimp mixture. Add half the mayo mixture and stir till combined. Keep adding mayo till you achieve the consistency you desire. Refrigerate for several hours before serving.


DSC04207.jpg

For an easy appetizer you can use this shrimp salad to fill store bought phyllo cups.  Garnish with a piece of dill.


IMG_1795.jpg

Summer in a bowl!


SHRIMP SALAD WITH LEMON AND DILL RECIPE


Serves: 5 people
Prep Time: 20 minutes
Cooking Time: 4 minutes

INGREDIENTS

  • 2 pounds of shrimp

  • 2/3 cup of mayonnaise

  • zest of 2 lemons

  • 2 tablespoons lemon juice

  • 3 tablespoons fresh dill, chopped finely

  • 3/4 cup thinly sliced celery, 2-3 stalks

  • 1/4 teaspoon salt

  • ground pepper to taste

PREPARATION

  1. Measure out 2/3 cup of mayonnaise into a medium bowl.

  2. Zest the 2 lemons into the bowl with the mayonnaise. Be careful to keep turning the lemon as you zest so you only get the yellow zest and not the bitter white pith of the lemon.

  3. Cut the lemons in half and squeeze the juice into a separate small bowl. Put 2 tablespoons juice into the mayo mixture.

  4. Put the remaining juice and lemon halves into a large pot of water in order to boil the shrimp.

  5. Pick the dill off the big stems and chop finely.

  6. Add the dill, salt, and freshly ground pepper to the mayo mixture and stir till smooth.

  7. Turn the large pot of water and lemons on high heat.

  8. In a large bowl add ice and cold tap water for an ice bath for the shrimp.

  9. Once the water is boiling add the shrimp.

  10. Set your timer or stopwatch on your phone for 4 minutes. The water should come back to a boil. You know the shrimp are done when 1 or 2 shrimp start to float to the top.

  11. With a slotted spoon, place the shrimp in the ice bath.

  12. Drain the shrimp and peel.

  13. Devein the shrimp and wash again and dry thoroughly with paper towels.

  14. Pull out a larger bowl to add the shrimp to as you cut them into smaller pieces.

  15. Thinly slice the celery and add to the shrimp.

  16. Add half the mayo mixture and combine. Keep adding more mayo till you achieve your desired consistency.

  17. Refrigerate for at least 3 hours before serving.


PRINT RECIPE


In Salad, Main Course, Seafood

STRAWBERRY BUTTER

December 21, 2017 Julie Sanchez
DSC04095.jpg

I first had strawberry butter at Neimans in their tea room. I loved to slather it on their amazing rolls. It is equally satisfying on angel biscuits, in fact my kids assume that they always are served together...biscuits with strawberry butter. It is easy to make and highly addictive.


DSC04087.jpg

All you need is 1/2 cup of softened butter and 1/2 cup of strawberry jam.


DSC04090.jpg

Whip 1 stick of softened butter in a medium sized bowl.  Add the strawberry jam and whip till combined.


DSC04081.jpg

Pure Heaven on a plate.


STRAWBERRY BUTTER RECIPE


Serves: 8-10 people
Prep Time: 5 minutes

INGREDIENTS

  • 1/2 cup butter, softened
  • 1/2 cup strawberry jam

PREPARATION

  1. Whip the softened butter in a medium sized bowl.
  2. Add the strawberry jam and blend till combined.

PRINT RECIPE


In Breakfast
← Newer Posts Older Posts →